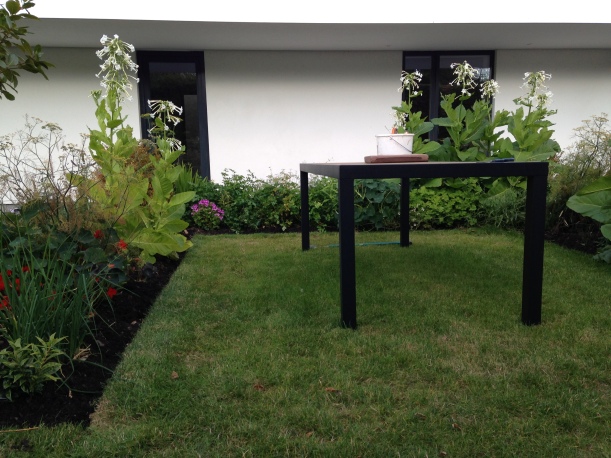
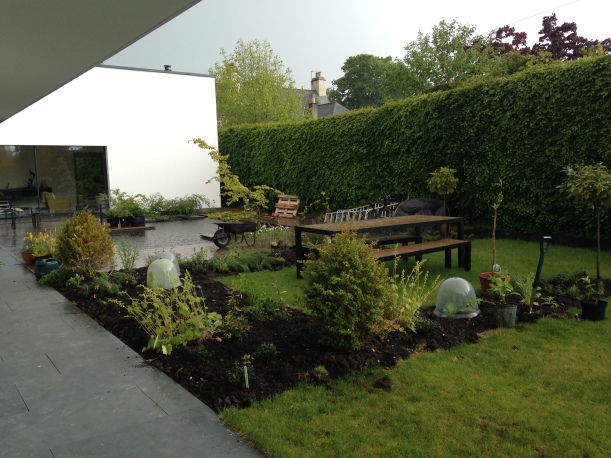
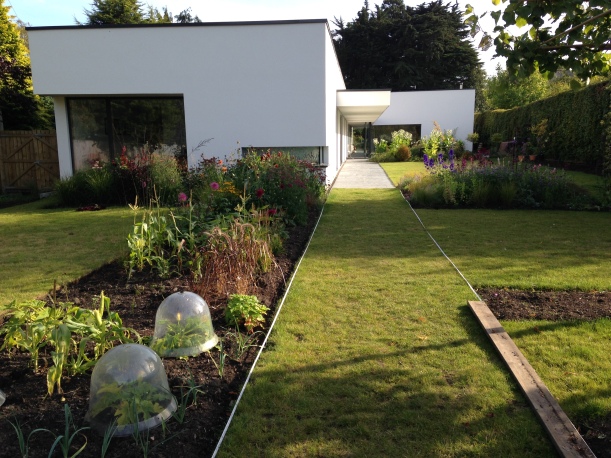
And the garden

When modern architecture goes outside


3 Comments

Ten Great Gardening Gifts under £15

I’m afraid my robust stance on what NOT to get gardeners has not softened in the intervening two years.  If anything, I have become more set in my ways.  Here is a list of stocking fillers, all of them under fifteen quid, that any keen gardener would be very pleased to get.

  1. Jumbo kneeler

    Yes, those ads in the back of Sunday supplements are accurate: garden kneelers are useful.  No, not those leather/chintz/Harris tweed covered ones, aspirational and pretty though they be. They all share the same fault: way too small, with only space for your knees side by side. If there’s something just out of reach, you have to get to your feet, move the kneeler 20cm and then get back down again, which over the course of a even a few minute’s gardening becomes irritating (even for those less prone to irritation than myself). I wound up never using mine, unless it was really cold and wet underknee. Then, clearing out my father’s toolshed earlier this year, I came across a giant, garishly coloured slab of foam: a vastly outsized kneeler. I commandeered it, brought it back with me to Scotland and have used it almost every day since. The kneeler I suggest you buy is even larger than my own, at a wildly generous 98cm by 39cm, and is truly a brilliant present for any gardener.  Its only downside is that it won’t actually fit in the stocking.At £10.95 from Harrod Horticultural

  2. Blade sharpening kit

    This duo from Darlac is brilliant. I have a similar little steel that I have to hand – so useful for a mid pruning-session sharpen of the secateurs.  And if you wanted to bowl your recipient over with your thoughtfulness, you could bung in a can of WD40, a couple of Brillo pads and possibly even a rag. Pop the lot in a shoebox and that’ll keep your gardener happily occupied through the bleak January days, productively sharpening every blade in the shed in keen anticipation of the coming spring.At £12.99 from Two Wests & Elliott
  3. Plant rings

    These little plastic coated wire rings are incredibly useful. I never throw them away, they last forever, and you can use them again and again.  I always have a few in my pocket for when I notice that something has flopped away from its support or the twine has broken – or the plant has grown and the point at which it needs attached has changed – and I don’t want to go back to the shed and get the full works. I use them to to secure tomato and cucumber plants to bamboo canes, to train the young branches of trees, to secure delphinium spikes onto canes, to train my climbers to their wires. I realise that as presents go they lack a certain wow factor, but you can’t have everything.At £1.99 from Kingfisher, available from all garden centres and Amazon
  4. Proper gardening gloves

    Be suspicious of gardening gloves that look pretty. A gardening glove should have a purpose: it is either a leathery gauntlet to protect your hands from being scratched by thorns, irritated by sap or burnt by fire; or designed to keep soil particles away from your skin and nails. I do not subscribe to the view that true gardeners love to feel the soil with their bare hands. When I see presenters on Gardeners World plunging their ungloved hands into the earth I physically shudder at the memory of running microscopically roughened hands over fabric and the unpleasant snagging sensation that ensues. So for standard garden work use these from Showa, and for anything requiring greater precision use these medical latex or vinyl ones. As well as also coming in very useful for kitchen use when chillis need chopped, you can snap them at the wrists as you put them on and waggle your eyebrows suggestively. That may be just in our household though.At £3.10 a pair from Just Work Gloves and others
    From £3.60 for a box of 100 gloves from Just Gloves
  5. Decent hand scrub

    My father, who started out as an engineering apprentice, swore by Swarfega, and always had a pot or ten about the house. I swear by Jo Malone’s Geranium and Walnut Scrub, but let’s face it, no way is that one going to meet the £15 criterion of this list. However, a genuinely good alternative that does is the Gardener’s Hand Scrub from Nutscene (also containing geranium), which is a delight to use and smells lovely.  Don’t wet your hands first: all three scrubs work (and feel) best when applied to dry hands, slowly massaged into the palms, backs of hands and fingers, then rinsed off with tepid water. Nutscene makes an equally good accompanying hand cream – I’m quite picky about products (but you already knew that) and I rate it.From £7.63 a 500ml pot, from Amazon
    At £40 for 200g from Jo Malone
    At £8.99 for 150ml from Nutscene
  6. Seed Voucher

    That thing about sitting by the fire when it’s lashing down outside, poring over seed catalogues? Never happened to me, I do my seed salivating in the evenings in front of my computer, but it doesn’t diminish the joy in knowing you have a voucher with an interesting seed company and you get to choose whatever you like. Free seeds, hurrah! You could get six or seven packets for a £15 voucher, and the firm will send you their list or catalogue too if you like. You cannot go wrong with a voucher from any of the following:Chiltern Seeds
    Special Plants
    Franchi Seeds of Italy
    Real Seeds
  7. Thermometers

    I’m going to recommend two types of garden thermometer, both of which I use (indeed I have two of each type and can always use more). Digital examples of both do exist, but I haven’t yet tried them so I can’t comment firsthand. The first type is a straightforward soil thermometer, robust and with a bright red ball on the top which means that when you lose it under the rush of spring growth, come autumn you stand a good chance of finding it again. Thanks entirely to this attribute, I’ve had my current one for over 15 years and three gardens.
    The second type is a minimum/maximum temperature recorder. I have one in my polytunnel and one outside so that I can nerdily compare the difference. Even more nerdily, I then record the temperatures in my garden notebook (see next item on the list).At £12.99  and £14.99 respectively, both from Two Wests & Elliott
  8. Garden Notebook

    See previous point. Any committed gardener needs a notebook, for all sorts of valid and not at all nerdish reasons. I jot down what I sowed and when, garden ideas, to do lists, plant wish lists and planting combination ideas. It is a calamity to visit another garden without a notebook, because the back of a scrap of paper jottings you make will inevitably be lost or put through the wash. My favourites are medium-sized lined hardback notebooks that stay in the polytunnel or shed, and smaller unlined ones that can be slipped into a pocket when out visiting.  Both from Moleskine.
    *** I am positively giddy with excitement having just learnt that for an additional £5 you can have your notebook personalised with your name or the name of your garden. “Gray House Garden. 2017” Deep breaths.***From £10.95 from Moleskine
  9. Root trainers

    These are the bee’s knees for sowing individual medium sized seeds like sweet peas or sweetcorn (broad beans are just a tad too large), or for propagating cuttings. As well as encouraging excellent root development, you can open up the sleeve without disturbing the roots to see how things are doing. After a number of uses the plastic sleeves do start to rip, but I’ve kept mine going for years.At £10.95 (currently £6.99, you could get two sets!) by Haxnicks from Amazon
  10. Pot of indoor bulbs

    Yes yes, I know I should have ordered my bulbs for forcing in September when I did my annual tulip order, but I was so profligate with the tulips and lilies that I had to cut something, and that’s what went. And now I am forced to buy my hyacinths and amaryllis in pots, already in growth (and I’m noticing that once you allow for the pot and the time, there’s not that much in it, pricewise). There is something so utterly cheering for the gardener about spring bulbs, tangible proof that spring and summer will come again. Any supermarket will have those baskets of three hyacinths – white or blue please, not pink, and none of your sparkly ‘decorations’ thank you very much – but M&S are doing a particularly charming range of muscari in little milk jugs which I think must be instore only, because I can’t find them online. Three of those would be just dandy.

Whatever you choose to get the gardener in your life, I wish you and them a very happy Christmas and a lovely start to the eagerly awaited new year. Come on 2017!


3 Comments

Solace in Plastic

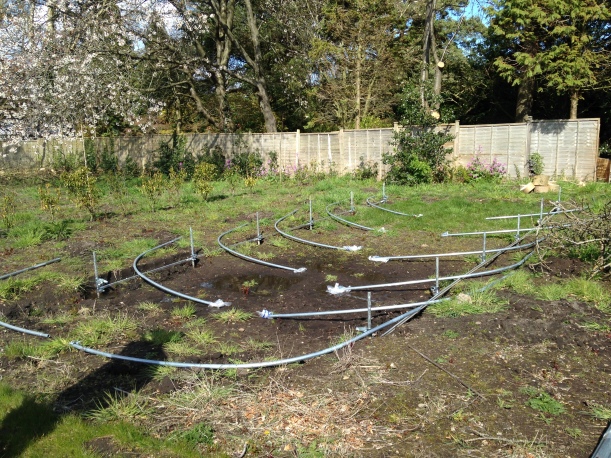
I am keenly aware that everything is relative, but personally, it has been a wretched twelve months. Gardens and gardening have always been a refuge for me in bleak times, and this year I owe my sanity to six metal hoops and a 12m length of polythene:

IMG_1156.JPG

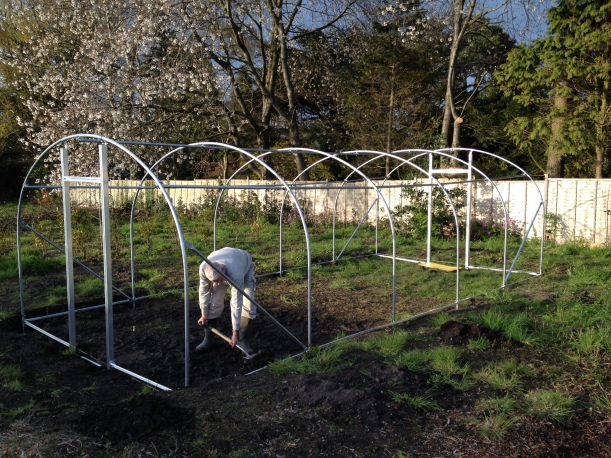
Putting up a polytunnel is not particularly difficult, but it took much longer than we imagined. As we laboured, the fee quoted by the excellent Northern Polytunnels to both supply and erect it seemed increasingly reasonable – and by the end of the job, a positive bargain. For me, supply only was the chosen option, not only due to an outraged and spluttering misplaced sense of thrift, but because I had a detailed plan for raised beds inside the tunnel, and they would be much easier to build and fill before the polythene cover was on.

IMG_9856.JPG

Conventional wisdom and all the best advice (I can wholeheartedly recommend The Polytunnel Handbook and subsequent How to Grow Food in Your Polytunnel, both by Andy McKee & Mark Gatter) dictate that you get the cover on in early spring, in order to make the most of the polythene’s first summer when it lets the most light through: the material degrades over its roughly five-year lifespan, slightly diminishing the light transmission. We began the groundworks at the start of May, and finally got the cover up on 11 July, by which time any hope of a conventional polytunnel growing season was long past.

IMG_9862.JPG

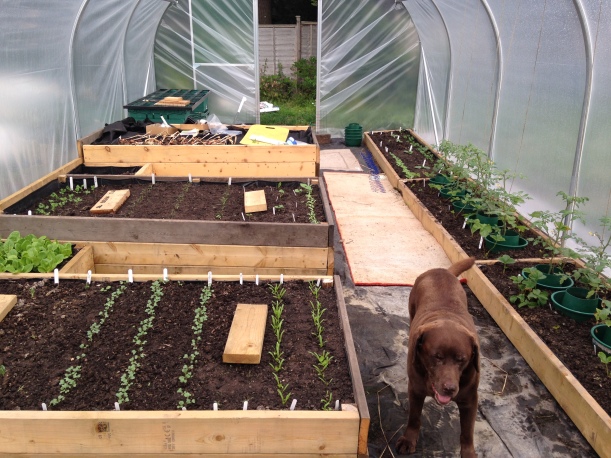
It took us so long because we had to snatch the odd weekend or evening to do the work, and my plans for the staggered raised beds needed much contemplation and calculation – and endless cups of tea. My aim was to maximise the growing area while ensuring that I had comfortable access to every part of every bed; and could get a wheelbarrow from one end of the tunnel to the other without bashing into sprawling plants and damaging them. I also wanted an area for a potting bench where I could sow and prick out seedlings, and space for a folding chair.

IMG_9960.JPG

The actual layout was pretty much as I drew it on the plan, allowing for an 80cm central path, minor access paths between the beds of 45cm wide (one can carefully squeeze in between the overhanging plants if it’s just to weed or harvest), and no bed wider than 1.2m so I could get at the middle from either side with ease.

Responding to the broadly E/W orientation of the tunnel and trying to avoid the plants in one bed shading out another, I varied the heights of the raised beds. I had a single plank-high bed running along the entire south edge (although I dug a trench down the spine of it to allow for greater rooting depth) and successively taller beds on the north side (two, three and four planks-tall respectively).

IMG_0355.JPG

My garden is infested with horsetail, that perennial, prehistoric and invincible weed, so I covered the whole interior of the tunnel with a layer of geotextile membrane, and then lined every bed with more membrane, using a staple gun to fix it to the sides. The dratted stuff still comes through, but weakened and in manageable amounts that I can easily pull by hand. While I occasionally use chemicals to suppress weeds in the wider garden, I choose not to whenever possible, and never in the kitchen garden. The horsetail problem meant I had to import all the topsoil for the raised beds, along with organic matter (spent mushroom compost, in this instance).

At this point it did occur to me to wonder how many tonnes of tomatoes etc would I have to grow over the years to even approach breaking even financially, but I picked up my stack of seed catalogues and put the thought firmly from my mind.

IMG_0365.JPG

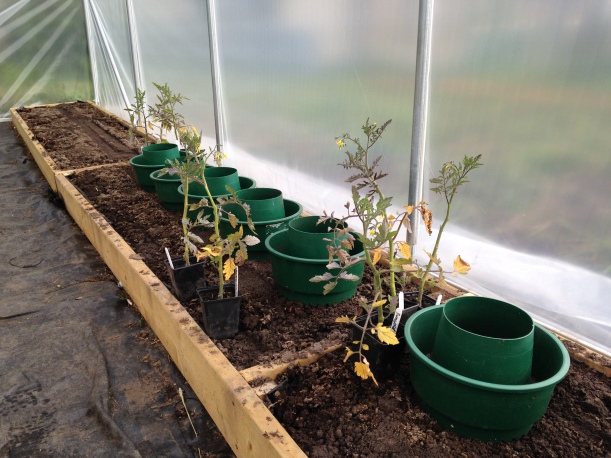
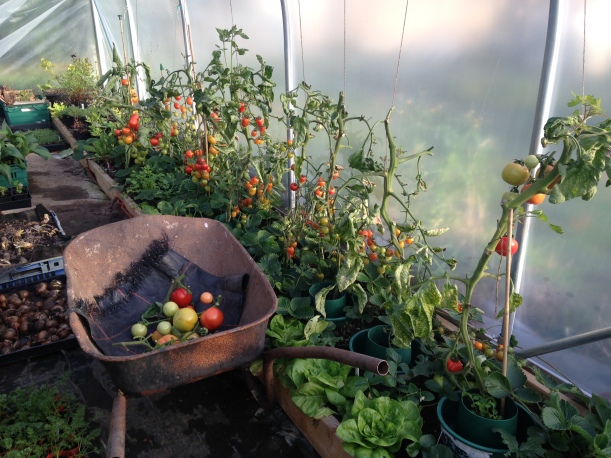
After months of planning, and months of building, on 11th July 2016 the cover went on and the first plants went straight into the beds. This rather motley collection of tomatoes were a gift, back in May, from a gardening friend who had spares. The unhappy plants had languished in small pots and with uneven watering for two months, but I reasoned it was too late to grow any of my own from seed and the garden centres had long since sold out of plants: I had nothing to lose by trying.

Racing the Scottish summer, I sowed a lot of seed that first week: courgettes; baby cucumbers; broad beans; french beans; lots of different salads; radishes; florence fennel; herbs; beetroot; broccoli; peas; sugar snaps; spinach; spinach beet; and many more. Normally, one would not need to plant all these in a polytunnel, especially during the summer. However, because of the dreaded horsetail, there is little point my sowing any veg outside until I can build similarly constructed raised beds in the area I have designated as the kitchen garden (a project I hope to start this winter).

IMG_0444.JPG

Still, after a fortnight, most seeds had germinated and I was on my way. By the end of August, only six weeks from sowing, the harvest was a heart-lifting delight, with pak choi and courgettes and radishes and fennel thinnings. I made it a mission to use all the thinnings in the kitchen, throwing none away, and discovered how deliciously intense their flavours can be, once one lets go of the idea that there is only one shape, size and stage at which one should eat a vegetable.

IMG_0877.JPG

The tomatoes far exceeded my expectations. They cropped from late September to the start of November, when I chopped all the plants down and brought the green ones inside to ripen. It has been a joy, over the summer, to do tomato taste tests with my 10 year old, and I have watched his openness to trying new vegetables expand. Fennel still remains beyond the pale, but then it does for his father too: I eat my lemon-braised fennel by myself, or with girlfriends, and I don’t care a jot. I am currently planning next year’s crop with greedy anticipation.

IMG_1100.JPG

This year has seen so much death so close to me: in our immediate and extended family; our friends; our pets; our colleagues. I have been bruised by chronic injury; absurd planning applications; and by seemingly never ending vicious political divides. I have felt very low. I worry that it will sound trite, but working in my polytunnel, cocooned in quiet contemplation of seeds, of life, tending my growing plants and growing boy, feeling wordlessly connected to those I love and this planet: all this has helped me heal. I think it now feels right to move forwards, and count my blessings, and truly they are many.

As a horticultural student I glibly referenced studies demonstrating the beneficial effect of gardens on hospital patients and those with depression, but never have the therapeutic benefits of gardening been brought home to me quite so powerfully as in the past twelve months.


1 Comment

When is it stealing?

I have a rule: if the artist or creator is still alive, I won’t buy the knockoff.  I will either save up for the original or buy something else that I can afford (hence the amount of IKEA in my home).  Or – and this is actually much better – I will find a local artist or maker and commission something bespoke.

If the creator of the iconic piece I yearn for is dead, however, the needle on my moral compass goes into a tailspin.

Knock offs of Le Corbusier and Eileen Gray

There are two knockoffs in the photo above: the Eileen Gray side table (we have a pair) and the ubiquitous Le Corbusier chaise (in pony skin). I got all three over a decade ago, before I formulated my views on design copyright and unlicensed reproductions.

It’s not that licensed E1027 side tables just weren’t available to me: why, a couple of clicks on ARAM’s website and I could have had a pair, in 4-6 weeks, for a shade under £1000, plus some £150 delivery.  Or I could take my pick from the dozens of knockoffs a simple Google search brings up, ranging from £50-£250 per table, within 7 days and for £12 delivery.

Ditto the LC4 Chaise Longue: £3,300 vs. knockoffs starting for £170.

As it happens, design karma may well have been involved in that last purchase, since after a few years the pony skin (horse lovers relax, it’s cow hide) started shedding like a labrador and now anyone wearing dark clothing who rashly sits on it subsequently has their back covered in fine white hairs that cling, annoyingly.  Although, the same is also true for an inordinately expensive and unimpeachably authentic impala hide handbag* I bought while on safari, so shedding might just be a property of hide in general.

In planning our house, I really wanted these glorious hanging lights designed by Vancouver designer Omer Arbel for Bocci over our dining table (and I discovered them way before they were so successful, from the now defunct but still useful archive SlowHomeStudio.  Go me.).

https://i0.wp.com/futurelightdesign.co.uk/bocci/wordpress/wp-content/uploads/2015/05/14-gallery-1.jpg

I couldn’t afford as many of the originals as I needed for the space, and I didn’t live close enough to go to their annual sale. So I started searching for knockoffs online, and I did find them. And that’s when I discovered that personally, my moral compass is not OK with ripping off a young designer, towards the start of his/her career, who has created something beautiful and functional, for which he should get the reward, and which will give him and his company the financial security to invent more amazing stuff to add to the great design treasury that lifts our hearts.  I probably won’t feel the same duty to his heirs, but I am OK with that.

As a result of my principled stance, the space above our dining table remains bare, and we eat in candlelit obscurity while I try to squirrel away enough money to commission a local ceramicist to design something for us.  I sense this is the way to go, and I will let you know how I get on.

I acknowledge that the excellent and very human architectural musings from Bob Borson at Life of an Architect have shaped my views – especially this post and thought-provoking comments –  as have the brilliant posts on design in general from Seattle-based Build LLC architects & builders.

But I wasn’t expecting to find the same issues cropping up in the garden.

This below is the eastern facade of the multi-storey car park beside the Olympia public swimming pool, in Dundee.  I think the external treatment is one of the most beautiful I have ever seen, and I frequently stop in front of it to adore it.  I knew right away that I had to find a way to incorporate something like it into my garden.


The inside of the carpark reveals the very straightforward construction: rectangular metal grids with horizontal bars running across them. Short lengths of plastic tubing are threaded onto the bars, and a small steel plate has its top edge molded over the plastic tube, securing the plate to the grid while allowing the bottom edge to swing freely back and forth.  Shouldn’t be that hard, I thought, but it might be even easier to buy it directly from whoever supplied the car park builder.

IMG_6882


A bit of digging revealed the builder, and their supplier, and then the information that “the concept was pioneered by American environmental artist Ned Kahn. He constructed a “wind veil” 13 years ago on a parking garage in Charlotte, North Carolina, and it has now been used on a number of major buildings in the United States.”

(This video collection catalogues Ned Kahn’s mesmerizing, enchanting, transporting kinetic sculptures involving wind, water, light, fog and even electricity.)

Now there’s a line beyond which homage to and influenced or inspired by becomes outright copying – stealing – and I’m not totally sure where that line is. Did the supplier copy Ned Kahn’s work? The concept, sure, but can or should anyone copyright such a concept? The technique? From what I can make out, the technique they used is different to any used in Kahn’s work.  I would be interested to know what Ned Kahn thinks.

And what about me? I am going to copy this concept, somehow, in some form, at some domestic scale, by hook or by crook, for my  garden. Where do I stand?

Thoughts, anyone? Where’s your line?


* Our South African friends later told me, rocking with mirth, that it was the equivalent of wearing a musical ‘See you Jimmy’ hat down the Royal Mile in Edinburgh.


3 Comments

Edging: the exception to the rule

When tackling a garden, it is much better to focus your efforts on one small area at a time rather than attempt to start a number of projects simultaneously.  Years ago, my husband (under duress) and I would spend entire weekends flat out doing a bit here, a bit there, only to look up, knackered, on a Sunday evening and not notice any real difference in the garden.  It is important for one’s morale to see results.*

One exception to this rule of targeted effort is that of edges.  Getting your edges right delivers masses of result for relatively little effort, and you can afford to be more profligate in generously distributing your gardening favours around the garden.

There are two schools of thought: those who edge (we are the majority) and those who prefer a more relaxed natural progression from say, path to bed or lawn to border.  Context, style of garden and owner’s temperament all come into this, but it is an Indisputable Truth of Gardening that:

A crisp edge will make everything on either side of it look as if it was intended.


https://i0.wp.com/www.biddenhamgardenersassociation.org.uk/wp-content/uploads/2013/09/P6030070e.jpg

An informal but crisply edged mown path meandering through a meadow. Photo copyright Biddenham Gardeners Association

So, even if the lawn is full of weeds and the border a flopping sprawling disaster where one thug plant has swamped most of the others, a sharp edge to the lawn separating it from the border will cozen the unobservant into thinking that it was meant, that the gardener is still in control.

As detailed in this thoughtful post by Thomas Stone at ThinkingGardens, there are many ways to edge, involving varying effort and expense. After simply mowing an edge into grass (or not bothering at all, I suppose), the ‘cut and weed’ version for simple grass edges that I explain below is the cheapest and easiest to install – and, as Thomas rightly points out, the easiest to move if you decide it’s in the wrong place.  However, the subsequent maintenance is greater than that required for a metal or stone edge.

An edging technique that I covet, but cannot yet afford, is the Corten steel edging that nearby Cambo Gardens use. This only works where you have border on one side and a path that doesn’t need mowing on the other (since you would not be able to mow the 15cm or so closest to the vertical edge, and would have to do it separately, by hand or by strimmer – either way a complete pain).

Corten steel edging

Corten steel edging the beds at Cambo Gardens, Fife

I think there is a place for the more relaxed unedged path or border in the wilder, informal areas of the garden – indeed, a formal edged path would undermine the very wildness.  In the as yet non-existent hidden woodland area at the bottom of my garden I plan to mow a path through the grass where there’s meadow, and simply mulch a path under the trees, like they do at Knoll Gardens.

A mulched path with no fixed edge at Knoll Gardens, in Dorset

A mulched path with no fixed edge at Knoll Gardens, in Dorset

But close to the house?  Close to my house, all lines and boxes and angles? Crisp edges all the way, thank you very much.

IMG_8088   IMG_8095

To create your new straight grass edges you will need:

One or more long plank (you can make do with string pulled tight between two bamboo canes but a plank is vastly better).
Four pegs per plank (pegs can be short lengths of sturdy bamboo cane, handtools, etc., anything you have to hand but you will regret using the kitchen scissors. Who, me?)
Very long outside tape measure (optional unless things really have to line up over long distances – I have two 50m ones – surprisingly useful**)
Half-moon edging iron (a spade will not do the job due to its concave-ness)
Garden fork
Bucket
Handfork
Padded kneeler (not vital but you’ll be glad of it)

If you are doing wavy edges, not straight, you can forget about the planks and use a generous length of hosepipe instead.  You’ll still need the pegs, and more of them, so that you can mark out the curves the hosepipe will follow.  And you will also need a can of builder’s marking paint to spray the line – once you’re happy with it – onto the grass to allow you to move the hosepipe to prevent you slicing through it with the edging tool. (What? Move along, nothing to see here.)

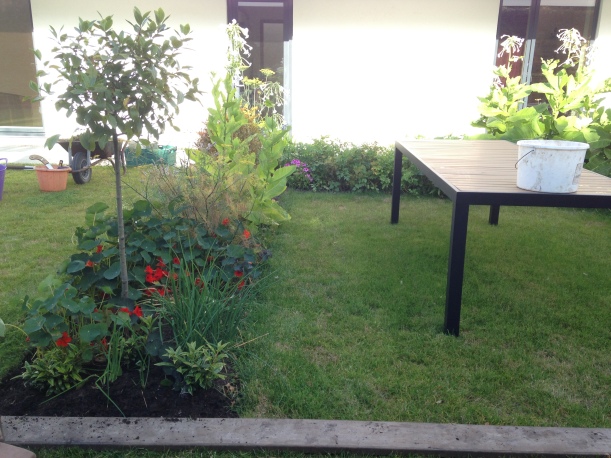
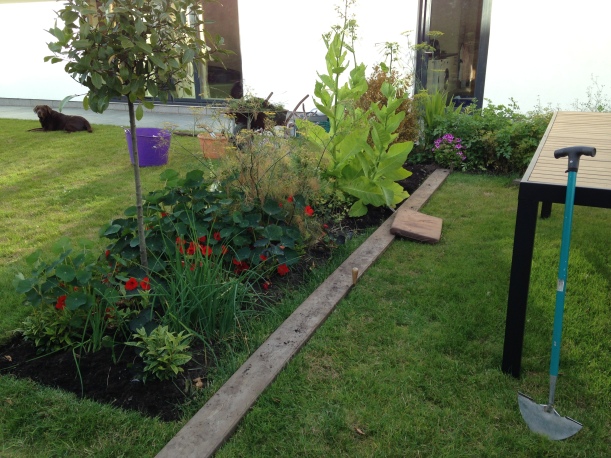
The example that follows is the eating area close to the house surrounded by a horseshoe bed of Sarcococca (Christmas box), herbs and edible flowers. Nasturtium flowers give a lovely peppery kick to a salad, but the lurid colouring of the one below – N. Empress of India – offended me all summer and I eventually hoicked it out way before the frosts were due (I grew a darker one – N. Black Velvet – around the other side that was fine).  You don’t need to tell me: I know it looks garishly vile in my terribly tasteful green and white scheme. Next year I will grow it in the kitchen garden.

IMG_8027

There is no definition between the lawn and the bed

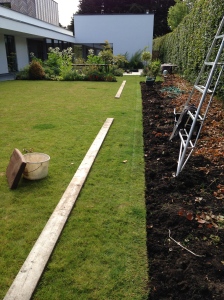
First set your plank roughly where you think you want your edge to be, with the plank sitting on the grass, and the line you want to cut its outer edge.

Mark out the line of the edge with a plank

Mark out the line of the edge with a plank

Now get up and walk to one end of your proposed edge and consider its placement, then the other.  Walk around the garden, squinting at the line, from every angle you can.  Bash pegs in on the other side of the plank.  Walk around some more.  Make adjustments to the plank and pegs accordingly, then do the whole walking around squinting at it thing again. Although it seems a faff, this time spent measuring by eye is never wasted.  As someone I used to work with taught me: if it looks wrong, it is wrong, even if the measurements on paper – and the ground – are correct.

When you are happy with the line, secure the plank with the pegs, then stand on it and slide the edging tool against the edge of the plank, pushing it down to slice through the turf with the sole of your boot.  Position, push down to slice, pull up and shuffle along 15cm or so and repeat.  Make sure the pegs aren’t bending and letting the plank pivot.

Once you have got your sliced line, go along it again but this time with a garden fork, standing on the plank again to stop it moving and sliding the backs of the tines right against the plank about 10com into the ground and then gently levering the cut edge loose.  Do this along the whole length of the line.

Now get the kneeler out, and your bucket and handfork, and start removing the loosened turf (and probably weeds), shaking off as much soil as possible into the middle of the bed. And that’s it. When you’re done, remove the pegs, the plank, and admire your handiwork.

The crisp edges give definition to the spaces on either side of the line

The crisp edges give definition to the spaces on either side of the line

An effect only possible with crisp edges is the impact afforded when plants are allowed to billow or sprawl over the edge.  There’s something about a straight line that just begs to be broken.

Herbs are allowed to sprawl over the line of the edge

Herbs are allowed to sprawl over the line of the edge

And as an aside, the above is all one season’s growth.  The bed was dug and planted in May of this year (below).  The cloches are protecting the Nicotiana sylvestris (tobacco plant) got as sturdy pluglets from Sarah Raven, which are the 6′ tall exotic looking plants with white trumpet like flowers in the photo above.  Staggering growth in just one season, but although they’re supposed to scent the air on warm summer evenings, I didn’t really notice.  Perhaps something to do with the lack of warm summer evenings this year?

The herbs sit in pockets of the Sarcococca matrix

The herbs sit in pockets of the Sarcococca matrix


*For this reason I also recommend starting with a bit of the garden close to the house, that you see everyday, and working your way outwards.

**

Long tape measures come in handy for marking out very long straight lines

Long tape measures come in handy for marking out very long straight lines


6 Comments

Pinheads and Dinnerplates

Hardy cyclamen are wonderful plants, quite unlike their trashy indoor cousins.

I have a particular weakness for scent, autumn colour and plants with winter interest, and although unscented the ivy-leaved (or Neapolitan) cyclamen excels in the latter two categories, sending up its charming pink recurved flowers in the autumn, and most obligingly holding on to its heart shaped leaves, intricately marked with silver, over the winter months, shedding them over the summer when their absence goes unnoticed in the midst of all the other star horticultural performances.

cyclamen in planter

I really should investigate Cyclamen coum, which flowers from December to March and would take over nicely from the September to November flowering of C. hederifolium, but I have read that if planted together C. coum will in time (which is relative – centuries, probably) come to dominate, so I will have to wait to find a source and a good spot.  However their circular leaves are unmarked and nowhere near as interesting.

The greatest downside of C. hederifolium, if one wants a swathe of them (and who would not?), is their cost.  Even my first choice of bulb supplier, Peter Nyssen, was charging over £1 per tuber.  At this point, I turned my beady and acquisitive eye towards my unsuspecting mother.  My mother is not a gardener but she is hugely generous of spirit and has a lovely garden, blessed with great drifts of hellebores and, I remembered covetously, hardy cyclamen.

When we were building the house and lived for almost five years in rented accommodation with a pocket handkerchief of a garden, she made me up a horticultural care parcel containing plants from her garden which I arranged together in a planter and which lifted my frustrated gardening spirits no end.  (In the preceding sentence I use the term  ‘made me up’ as a euphemism for ‘allowed me to plunder her garden during one of my visits, digging up what I wanted, and leaving it for her to wrap in damp newspaper and post them all up to me in a cardboard box’.) There were a number of cyclamen tubers in this planter, and I had noticed that the flowers had set seed – those seedpods on curious little coiled springs – and that many had germinated into seedlings, a year or so old.  I resolved to turn out the planter, carefully, and prick out the seedlings into a tray of jiffy modules – why, I would soon have hundreds of hardy cyclamen.  Pricking out seedlings is soothing pastime, providing one sets up the bench or table to avoid being hunched over and getting a crick in the neck or between the shoulder blades, and I spent a restful and virtuous sunny October afternoon doing just that.

IMG_5880      IMG_5882

Pleased though I was with my labours, I recognised that it would be many years before the pinhead sized tubers produced any flowers, so I turned once more to my mother and asked her, with what I hoped was engaging directness, whether she would dig up some more tubers and send me them (or ‘instruct Tim who comes on Wednesdays to dig up etc’). Again she obliged, and Parcelforce duly delivered two boxes filled with magnificent tubers, some bigger than my hand (see photo below).  I have no idea how old they are, and while the literature relates how they can grow to the size of dinner plates, I have found nothing that gives a timescale for this development. Readers, if you can shed some light, I would be delighted to hear from you.

IMG_6058

The tubers themselves are odd, unpromising things, with hardly any roots, and it is difficult to imagine them ‘throwing up hundreds of flowers’ per tuber, as the books would have them do.  Bought dormant from bulb suppliers, many have no roots at all and it is often difficult to know which way up to plant them.  Planting any bulb, I think, is an act of faith, but cyclamen require belief of Orpheus-like proportions.

Out of curiosity, I also ordered some tubers from Peter Nyssen to compare, and a plant from Crocus, and then succumbed to buying some more tubers when I was in Dobbies (despite the recent mis-labeled anemone experience), to see which would  give me the best results for my time, effort and money.  Contenders in my unofficial and woefully unscientific hardy cyclamen trial are:

1) Five dormant tubers from Peter Nyssen (photo below left) – £6.50

2) Five dormant tubers from Dobbies garden centre (photo below right) – under £10

Nyssen cyclamen tubers     Cyclamen tubers Dobbies Taylors

3) Two boxes of tubers from my mother’s garden, semi-dormant (i.e. freshly dug up and showing some signs of root or leaf growth) – free, but clearly not everyone has access to such cyclamenic munificence

4) 300+ seedlings – free, ditto

5) A plant in a 9cm pot from Crocus (photo below) – £2.99

crocus cyclamen small

The plant (by its very definition in a non-dormant state) from Crocus was the real surprise, with that little 2cm tuber throwing up dozens of leaves and all those fine root hairs.  If the dormant tubers lumber into life with anything near this fecundity I shall have veritable carpets of cyclamen, I’m just finding it incredibly hard to believe this with any conviction. Having planted them this winter – a bit shriveled and apparently dessicated, with their crowns just below the surface of the soil and hopefully the right way up – I am not sure when I should expect signs of life, especially since winter is normally their non-dormant season.  Might I have to wait until September to see the first leaves? I just know I will not be able to resist digging one of them up to check whether root development is actually happening, and I hope this doubter’s impatience will not irretrievably damage the plant*.

I went to check on the tubers from my mother that I planted in the beds under the pleached limes, only to find to my annoyance that their stems have been neatly severed, and a few leaves left on top of the mulch.  The culprits are our resident rabbits, and I will position some cloches over the cyclamen while I hone my plans for a multi-pronged attack on the blasted creatures.

I will update this post with progress on the plants over the course of the year.  Yes, you have heard me say that before, but remember this is still a very young blog.  You may or may not have noticed that I have resorted to copying and pasting comments under my WordPress posts that dear and valued readers have put on my Facebook page.  I have been wondering what I could do to attract more comments, suggestions and questions to these posts – I would love to get some dialogue going. Is it because WordPress requires some horrid sign in process?  Clearly, if this is the case then you are hardly likely to sign in in order to tell me so.  If you prefer, you could tweet me @AndTheGarden?  Perhaps this too is merely a matter of time, and comments will emerge in the natural order of things. Or, for that matter, not.


* Should I ever be in the privileged position to name a new species of cyclamen, I shall call it Cyclamen eurydice, and take my chances at being smacked in the face for being such a smart arse.


3 Comments

My Mulish Conviction

No one *really* means it when they agree with my assertion that the garden is the one thing that is absolutely going to make this house.

People who merely pay lip service to the idea:

  1. Architects
  2. Quantity Surveyors
  3. Structural Engineers
  4. Electrical and Mechanical Engineering Consultants
  5. Builders
  6. Husbands


It’s all “Yes, of course, incredibly important” until it is discovered that the invert level of the sewage mains to which we need to link is at a higher level than expected, necessitating a pump – at some additional £5k –  at the end of our run into the mains sewer*.  Then, to a man, the unspoken consensus from all of the above is that the logical place from which this £5k shall be appropriated is the landscaping budget.

So it’s just me, with my increasingly ratty and stubborn conviction that spending 1/20th of the house budget on the immediate setting for the house will lift our already glorious proposed new house design into new realms of loveliness.

And now there’s this blog – so now there’s you, too.

*In fairness, I don’t imagine there are too many people who take the line: “Ah no let’s not bother with that.  What’s the worst that could happen?”