It seems as though every article I read about pleached trees includes the nugget of information that the word comes from the French word plechier or plessier, meaning to plait or weave. Gormlessly, I accepted this at face value, despite having grown up in then French-speaking Brussels; despite having spoken French rather well at one point; despite having plaited my hair as a schoolgirl and discussed this – in tedious detail, as one did – in French with my francophone friends; despite my never ever having encountered either variant of the word before. Someone, somewhere, made this up (or dug it out of an obscure French equivalent of Chaucer), and it has been repeated, unquestioningly, ever since. The correct term is ‘palissé’ or ‘en espalier’. So there.*
Whatever size trees you start with, you will first need to make your structure.
If you are starting with young trees that you will train from scratch, you need tall posts set in concrete at regular intervals (5m apart or thereabouts) with tensioned wire making up the horizontal bars between them (four or five bars is usual). Later this year in the courtyard garden I will be doing this too, with seven crab apple ‘Red Sentinel’ that I had to buy young (oh the satisfaction of ordering something on the right rootstock so that its ultimate size will be just right for my purposes). I have heeled them in beside the garage and will train them myself because I am looking for the lowest bar of the pleached branches to start lower than is usual with nursery supplied trees. And because it is much much cheaper. I will teach myself how to do this and post about it in due course.
This post however is about how to treat mature trees which have already been trained individually in the nursery: how to create a structure that links them together; and how to train them to it.
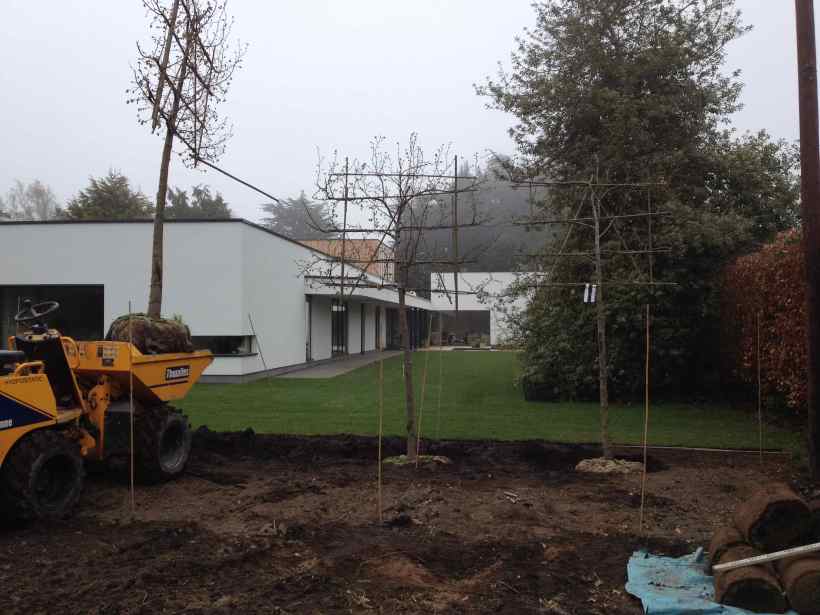
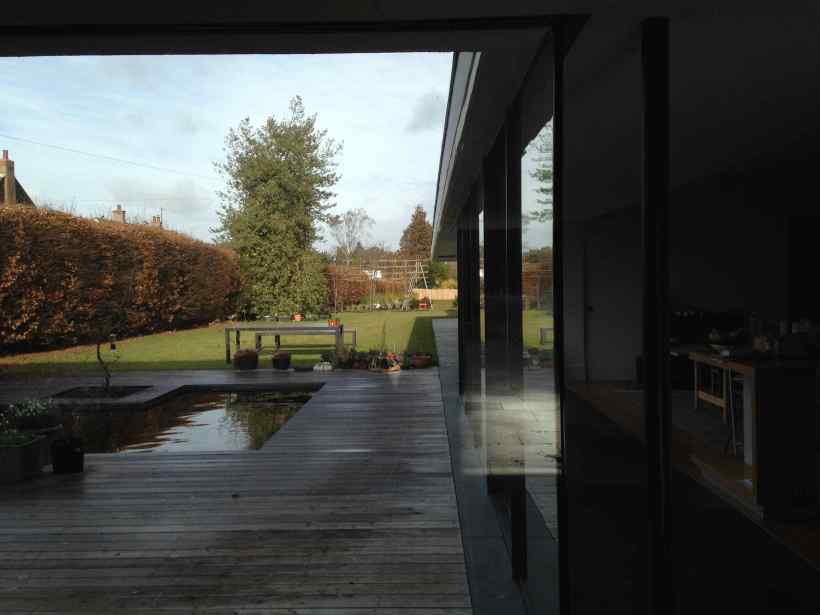
We planted six small leaved limes (Tilia cordata) in April 2014. By rights we should have done it a little earlier in the year (the trees were just starting to come into leaf), but although these were field grown trees they were dug up one day and transported to my garden the next, and they were to receive the very best of care, so we risked it. Their planting holes were large, the backfilled soil mixed with generous amounts of organic matter, and their rootballs sprinkled with liberal quantities of root growth enhancing mycorrhizal fungi (Root Grow, I SWEAR by it). They were tethered against windrock by an underground guying system (the excellent Arborguy from GreenBlueUrban), which means we didn’t have to have unsightly supporting posts, and each tree had a circle of perforated drainage pipe looped around its rootball with the end sticking up out of the ground, so that I could water them copiously (but only every now and then).
With a lot of hard work, we got them into position. I will not dwell on how unpopular my insistence that the trunks line up with the distant window breaks made me, nor how no one, myself included, made the leap of logic that suggested that a telegraph pole would indeed have an underground cable leading to it, which we promptly dug through. Once in position, I proceeded to do absolutely nothing to them (except water them and keep them weed free) for the next year. Mainly because I thought that they needed time to settle in before I started hacking them about, but in part because I didn’t really have a clue what to do next.
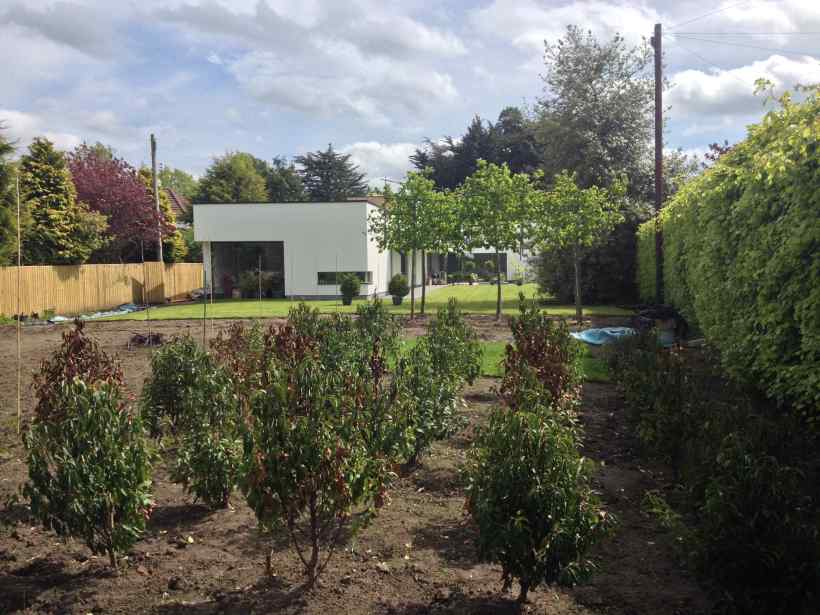
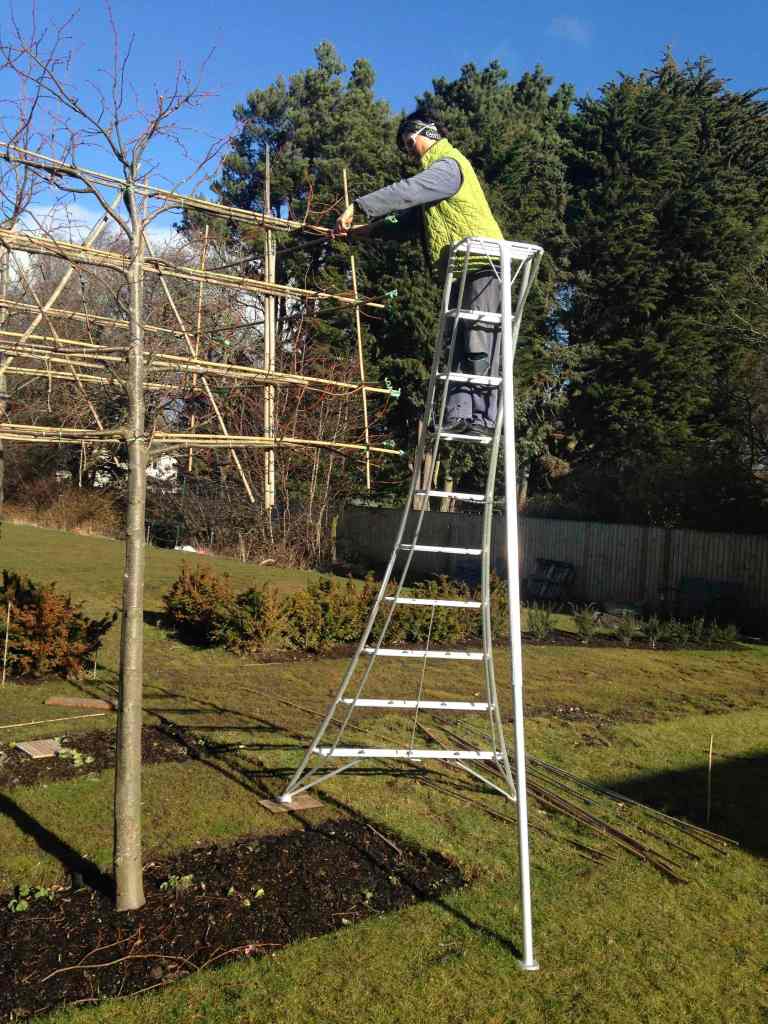
They passed an apparently happy summer (see photo above), coming into leaf and putting on lots of new growth while I bided my time and googled. Monty Don had what seemed to me to be sound advice, and equipped with my magnificent tripod ladder from Jake Hobson, my trusty Felco secateurs, a ball of twine and more bamboo canes than I imagined possible, I set to work in February 2015 to link these six disparate trees into a coherent whole.
Tip: wrap up warmly and wear wraparound glasses – being poked in the eye while balancing up a ladder in a howling gale is best avoided. Also, cut the twine into lengths (short bits of 35cm and longer bits of 80cm) while still in the warmth of the house, and stuff the different lengths into different pockets before you go up the ladder.
I found it was best to split the job into two parts: creating the new structure first and only once that was complete tying the branches onto the structure. My trees each had four bars of bamboo to which they had already been trained, so the first thing I did was to run new bamboo canes across the gap between the trees, weaving the canes in between the bamboo uprights and the trunks of the trees, and tying them securely into place to the existing bamboo bars with twine in at least four points along their length.
Once I had a solid – if slightly wavy – line of canes along each of the four bars, I then extended the structure out at either end with more canes, one end tied into the bamboo structure, the other reaching out to the point I wished to grow the foliage (above but abutting the datum).
Because the shape I am going for is a sort of shoebox on stilts, I want to train the branches of the two end trees to form right angles and meet in the middle. I therefore connected the two rows of trees with four horizontal canes (which I also braced with verticals in the corners for strength). By now the trees had more bamboo in them than they did tree (and over a week had passed), but I could finally start tying the branches to my bamboo structure.
Although the trees were quite twiggy and it had been fiddly to get the bamboo canes in place, until this point I had restricted myself to only pruning out the deadwood. One never knows when a branch will come in handy, and I learned that small leaved lime is amazingly bendy, which, it dawned on me, explains its popularity for this purpose. (I will have to be a lot more gentle with the more brittle crab apples when I come to train them.)
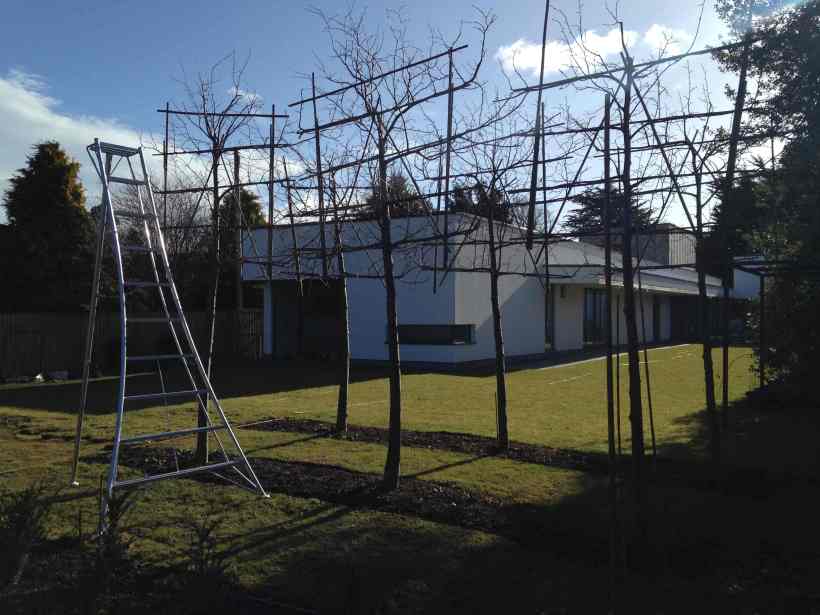
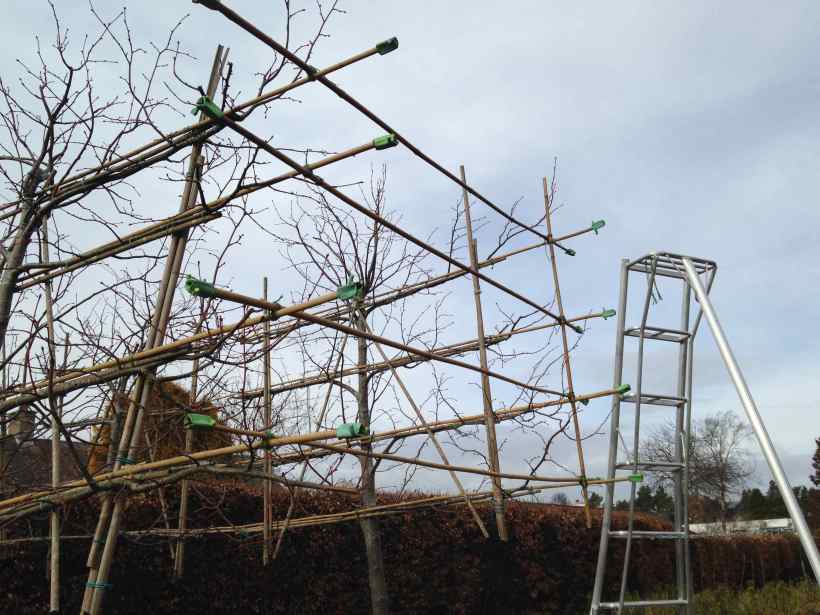
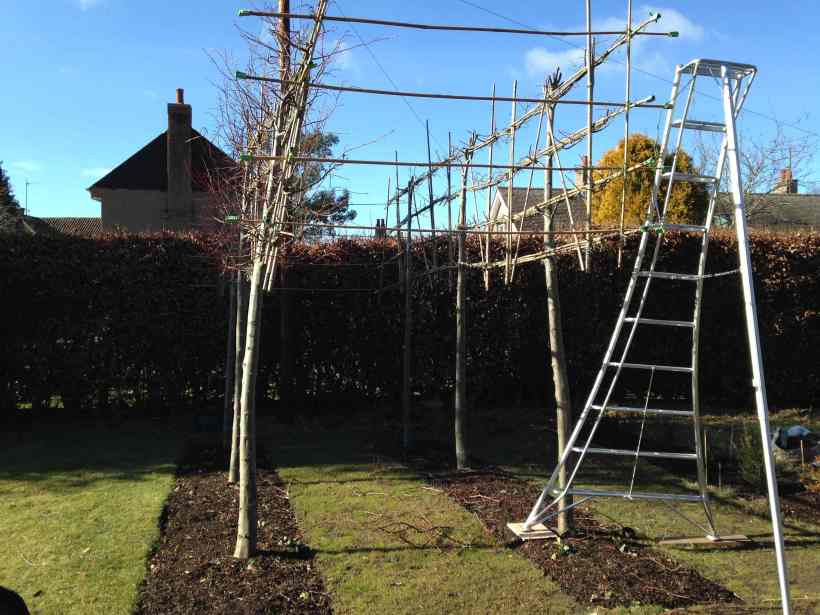
I tied in whatever I could to the horizontal bars, and then marshaled my quailing resolve and pruned out everything that was not in the right place for the shape I wanted, some branches back to 4-6″ or so, some right back to the branch bark collar with the trunk or main stems. I removed most of the new growth, as illustrated in the above photo showing the pruned back row and the unpruned front row (I started with the least visible bit until I got my courage up). The photo above also shows how we really should have thought at the outset about placing the six trees according to their straightness of stem, and hidden the one at the front on the left which has a backwards lean to it in a far less prominent position. I have built the structure to compensate, but I will have quite a job to train the bushy new growth out so that the vertical face of the ‘green box’ appears straight.
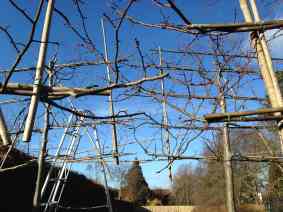
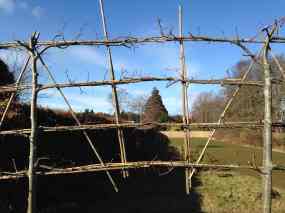
The two photographs above are before and after. And although I suspect that I might not have been ruthless enough, I will be very relieved come Spring to see them come into leaf.
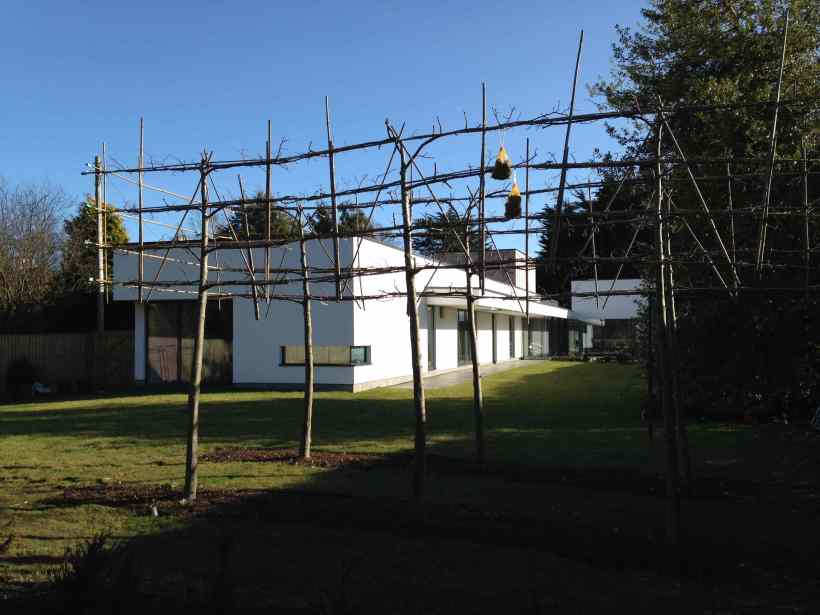
The above photograph shows the end result. I am very pleased with it, but looking at it now I think I will have to get back up my ladder and lop the tops of the vertical bamboo canes that break the lovely horizontal lines. The two orange bags hanging from the branches are mesh bags that some of my Peter Nyssen bulbs arrived in (see? I knew they would come in useful), weighted with rocks and tied to joins that had an upwards arc to them, to try to bring them slowly into line with the horizontal. My husband finds them vaguely unsettling, reminiscent of a medieval display of the heads (or worse) of one’s enemies on spikes . I can’t see it myself, but there’s a novel idea for a show garden at Chelsea if ever I heard one.
* I blame Anne Wareham for my pugnacious tone. I have just finished reading ‘The Bad Tempered Gardener‘ and I am feeling inspired.

September 9, 2015 at 2:21 am
Thank you for this really helpful blog about pleaching. I am just about to plant a single row of Manchurian Pear trees along our high limestone wall which I plan to pleach into a high hedge. I wasn;t at all sure what to do about the frame, and you have given me some really good ideas. I hope to read more on your blog as the trees develop and you start pruning. I live in Perth Western Australia.
September 11, 2015 at 9:29 am
Hi Amanda, thank you for your comment, I am so glad you found this useful. I confess I have never encountered Manchurian Pears in the UK – Pyrus ussuriensis, apparently – and had to google them. It took me, as these things do, to an eye-opening discussion about the dangers of the ‘strangely’ smelling Bradford Pear, Pyrus calleryana, and the crucial importance of getting the right cultivar that doesn’t smell as badly. Since I was intending to plant the cultivar P calleryana Chanticleer close to my house to screen a neighbour’s new project, your comment will make sure I do my homework! Manchurian pears seem (according to google) to be grown mostly in Australia, but take a look at the Victoria nursery Flemings http://www.flemings.com.au/default.asp and search for the term ‘Pyrus’: it reveals that the Manchurian pear – along with the Bradford pear – has been superseded by more recent superior introductions. This may or may not be of interest. Whichever pear you choose, I think the important thing is to start training them from the get go.
For my own screening purposes, I am attracted to Chanticleer because – like the Manchurian, I gather – it is one of the earliest to come into leaf/blossom, has great autumn colour, and holds on to its leaves the latest. I’d love to see a photo of what you do decide.
December 14, 2015 at 3:09 pm
Very interesting read on your Pleaching project. I struggled to find a How To when I planted mine, and I am (still!) convinced that the recognised wisdom is wrong. All the mature plants I see for sale are (like yours) trained to a frame in 2D, and everything I have read says to erect a line of posts, and horizontal wires, for 2D training. And yet the best mature pleaches that I have seen which have (as you so eloquently phrase it) a Shoe-box on stils shape to the best of my memory appeared to have been trained with a pair of branches coming out of the trunk forwards towards the final finished face and THEN split sideways along the run of the hedge – so the espalier horizontal branches ran on both sides of the hedge, rather than along the middle between the trunks . I think this has a much higher chance of making a nice “shoe-box”. Sadly I started noticing this long before I had planted my own, and before I started to ask the How To questions, and as such I assumed it was normal and never bothered to take any useful photos back then; I need to go back to the likes of Hidcote and take some fresh photographs. I very much dislike Monty Don’s and (similarly) the one at Sissinghurst which have the branches quite a long way apart (vertically) and are pollarded hard back in winter leaving just an ugly skeleton, I’d like mine to be a dense system of branches in winter (I imagine that I could pollard late if it turns out that I do need to prune then that severely). But maybe I’m completely wrong and a 2D arrangement, and then just run a hedge cutter along to form the shoe-box once the vigorous spring-growth is done, will get the right finished effect.
Couple of passing thoughts: I did the cut-some-string before going up the ladder the first year. It rotted after a while and I then had to sort out the inter-connected canes covered with the weight of the annual growth and leaf; I now use plastic self-locking pull-ties which outlive the canes (and can often be applied single-handed when reaching precariously far from the ladder!). I also have a Max Tapener plant tying gun – that is one of my Top Tools and can definitely be used one handed: push the jaws over the plant stem and cane, squeeze the trigger and it wraps some tape around the two, secures with a staple, and cuts the tape. We grow a lot of Sweet Peas and the like for cut flowers so I justified the cost on that basis 🙂
My adventures with my pleach are on my blog: https://kgarden.wordpress.com/projects/pleached-lime-hedge/
P.S. I have got on well with a Henchman High-Step platform for elevated jobs like training the pleach, although I must admit that I have not tried a 3-legged ladder. Alan Grey of East Ruston Old Vicarage (definitely my favourite garden to visit, the whole world over) has them for hedge cutting and speaks highly of them.
August 6, 2016 at 2:52 pm
Lovely, well-written post! I was hoping you might offer a follow-up update showing the results of all your hard work.
November 23, 2016 at 3:42 pm
Thank you! I will, even if, after a year, you have understandably lost interest!