
When tackling a garden, it is much better to focus your efforts on one small area at a time rather than attempt to start a number of projects simultaneously. Years ago, my husband (under duress) and I would spend entire weekends flat out doing a bit here, a bit there, only to look up, knackered, on a Sunday evening and not notice any real difference in the garden. It is important for one’s morale to see results.*
One exception to this rule of targeted effort is that of edges. Getting your edges right delivers masses of result for relatively little effort, and you can afford to be more profligate in generously distributing your gardening favours around the garden.
There are two schools of thought: those who edge (we are the majority) and those who prefer a more relaxed natural progression from say, path to bed or lawn to border. Context, style of garden and owner’s temperament all come into this, but it is an Indisputable Truth of Gardening that:
A crisp edge will make everything on either side of it look as if it was intended.

An informal but crisply edged mown path meandering through a meadow. Photo copyright Biddenham Gardeners Association
So, even if the lawn is full of weeds and the border a flopping sprawling disaster where one thug plant has swamped most of the others, a sharp edge to the lawn separating it from the border will cozen the unobservant into thinking that it was meant, that the gardener is still in control.
As detailed in this thoughtful post by Thomas Stone at ThinkingGardens, there are many ways to edge, involving varying effort and expense. After simply mowing an edge into grass (or not bothering at all, I suppose), the ‘cut and weed’ version for simple grass edges that I explain below is the cheapest and easiest to install – and, as Thomas rightly points out, the easiest to move if you decide it’s in the wrong place. However, the subsequent maintenance is greater than that required for a metal or stone edge.
An edging technique that I covet, but cannot yet afford, is the Corten steel edging that nearby Cambo Gardens use. This only works where you have border on one side and a path that doesn’t need mowing on the other (since you would not be able to mow the 15cm or so closest to the vertical edge, and would have to do it separately, by hand or by strimmer – either way a complete pain).

Corten steel edging the beds at Cambo Gardens, Fife
I think there is a place for the more relaxed unedged path or border in the wilder, informal areas of the garden – indeed, a formal edged path would undermine the very wildness. In the as yet non-existent hidden woodland area at the bottom of my garden I plan to mow a path through the grass where there’s meadow, and simply mulch a path under the trees, like they do at Knoll Gardens.

A mulched path with no fixed edge at Knoll Gardens, in Dorset
But close to the house? Close to my house, all lines and boxes and angles? Crisp edges all the way, thank you very much.
To create your new straight grass edges you will need:
One or more long plank (you can make do with string pulled tight between two bamboo canes but a plank is vastly better).
Four pegs per plank (pegs can be short lengths of sturdy bamboo cane, handtools, etc., anything you have to hand but you will regret using the kitchen scissors. Who, me?)
Very long outside tape measure (optional unless things really have to line up over long distances – I have two 50m ones – surprisingly useful**)
Half-moon edging iron (a spade will not do the job due to its concave-ness)
Garden fork
Bucket
Handfork
Padded kneeler (not vital but you’ll be glad of it)
If you are doing wavy edges, not straight, you can forget about the planks and use a generous length of hosepipe instead. You’ll still need the pegs, and more of them, so that you can mark out the curves the hosepipe will follow. And you will also need a can of builder’s marking paint to spray the line – once you’re happy with it – onto the grass to allow you to move the hosepipe to prevent you slicing through it with the edging tool. (What? Move along, nothing to see here.)
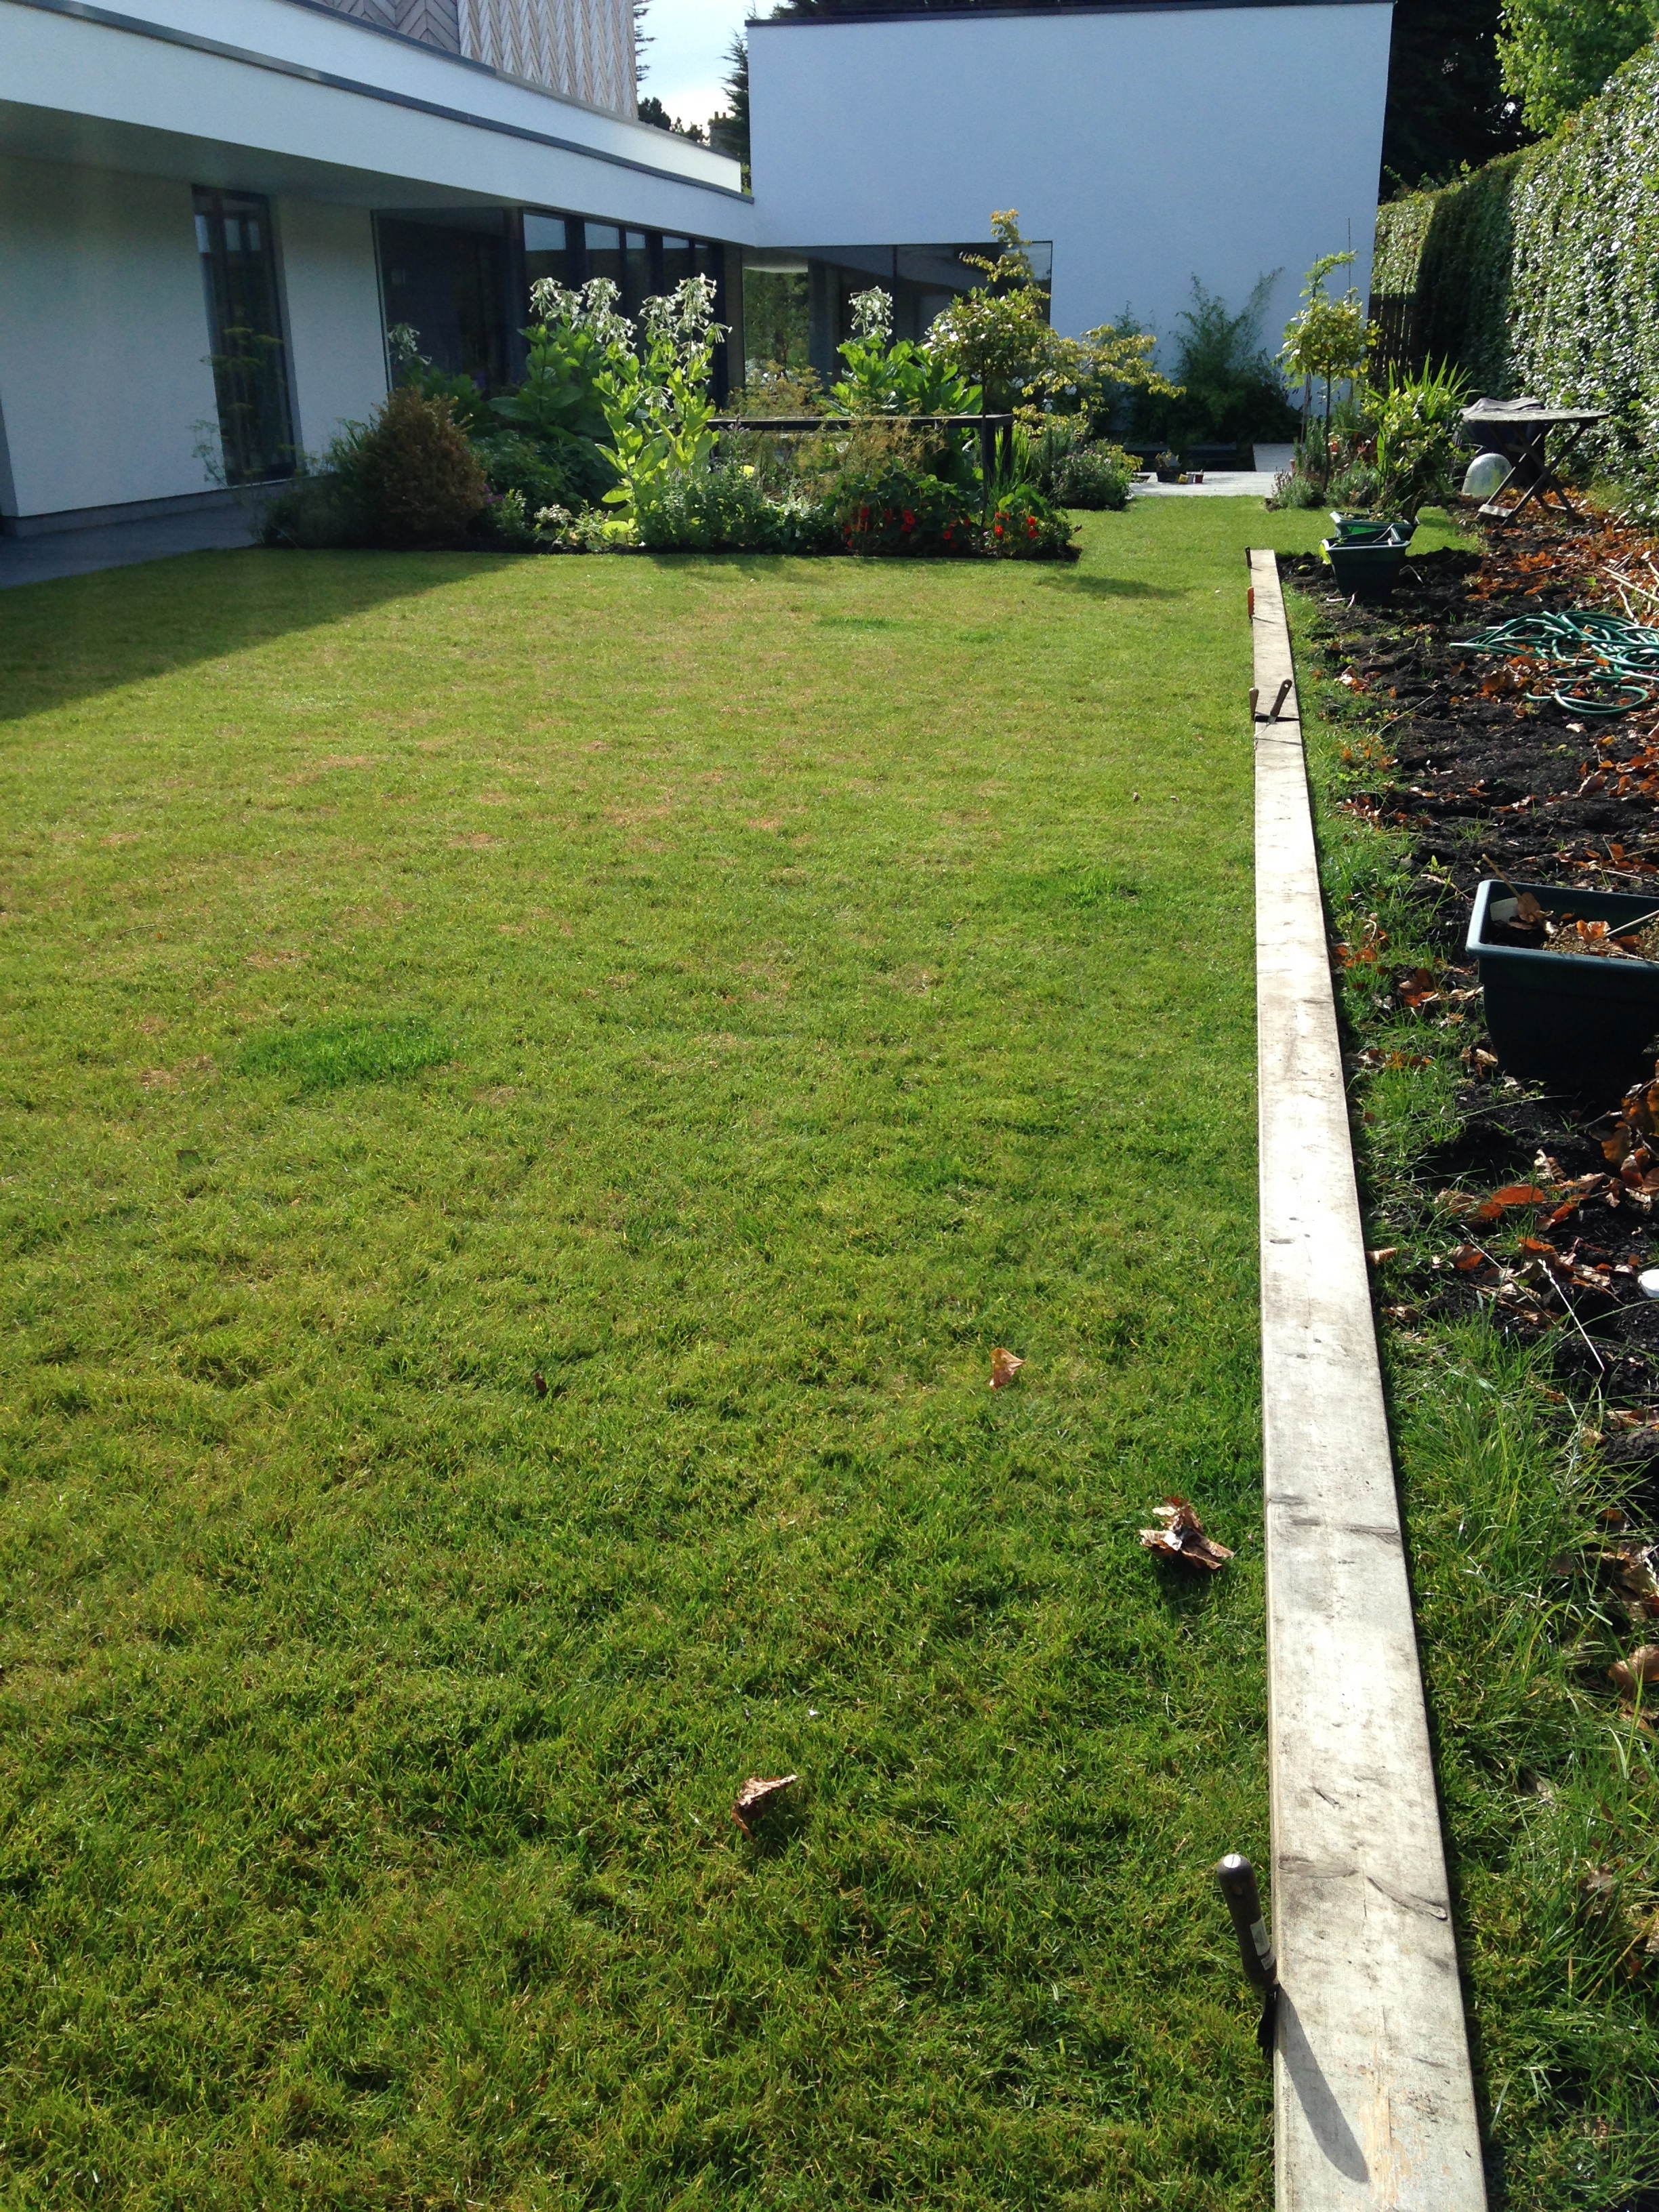
The example that follows is the eating area close to the house surrounded by a horseshoe bed of Sarcococca (Christmas box), herbs and edible flowers. Nasturtium flowers give a lovely peppery kick to a salad, but the lurid colouring of the one below – N. Empress of India – offended me all summer and I eventually hoicked it out way before the frosts were due (I grew a darker one – N. Black Velvet – around the other side that was fine). You don’t need to tell me: I know it looks garishly vile in my terribly tasteful green and white scheme. Next year I will grow it in the kitchen garden.

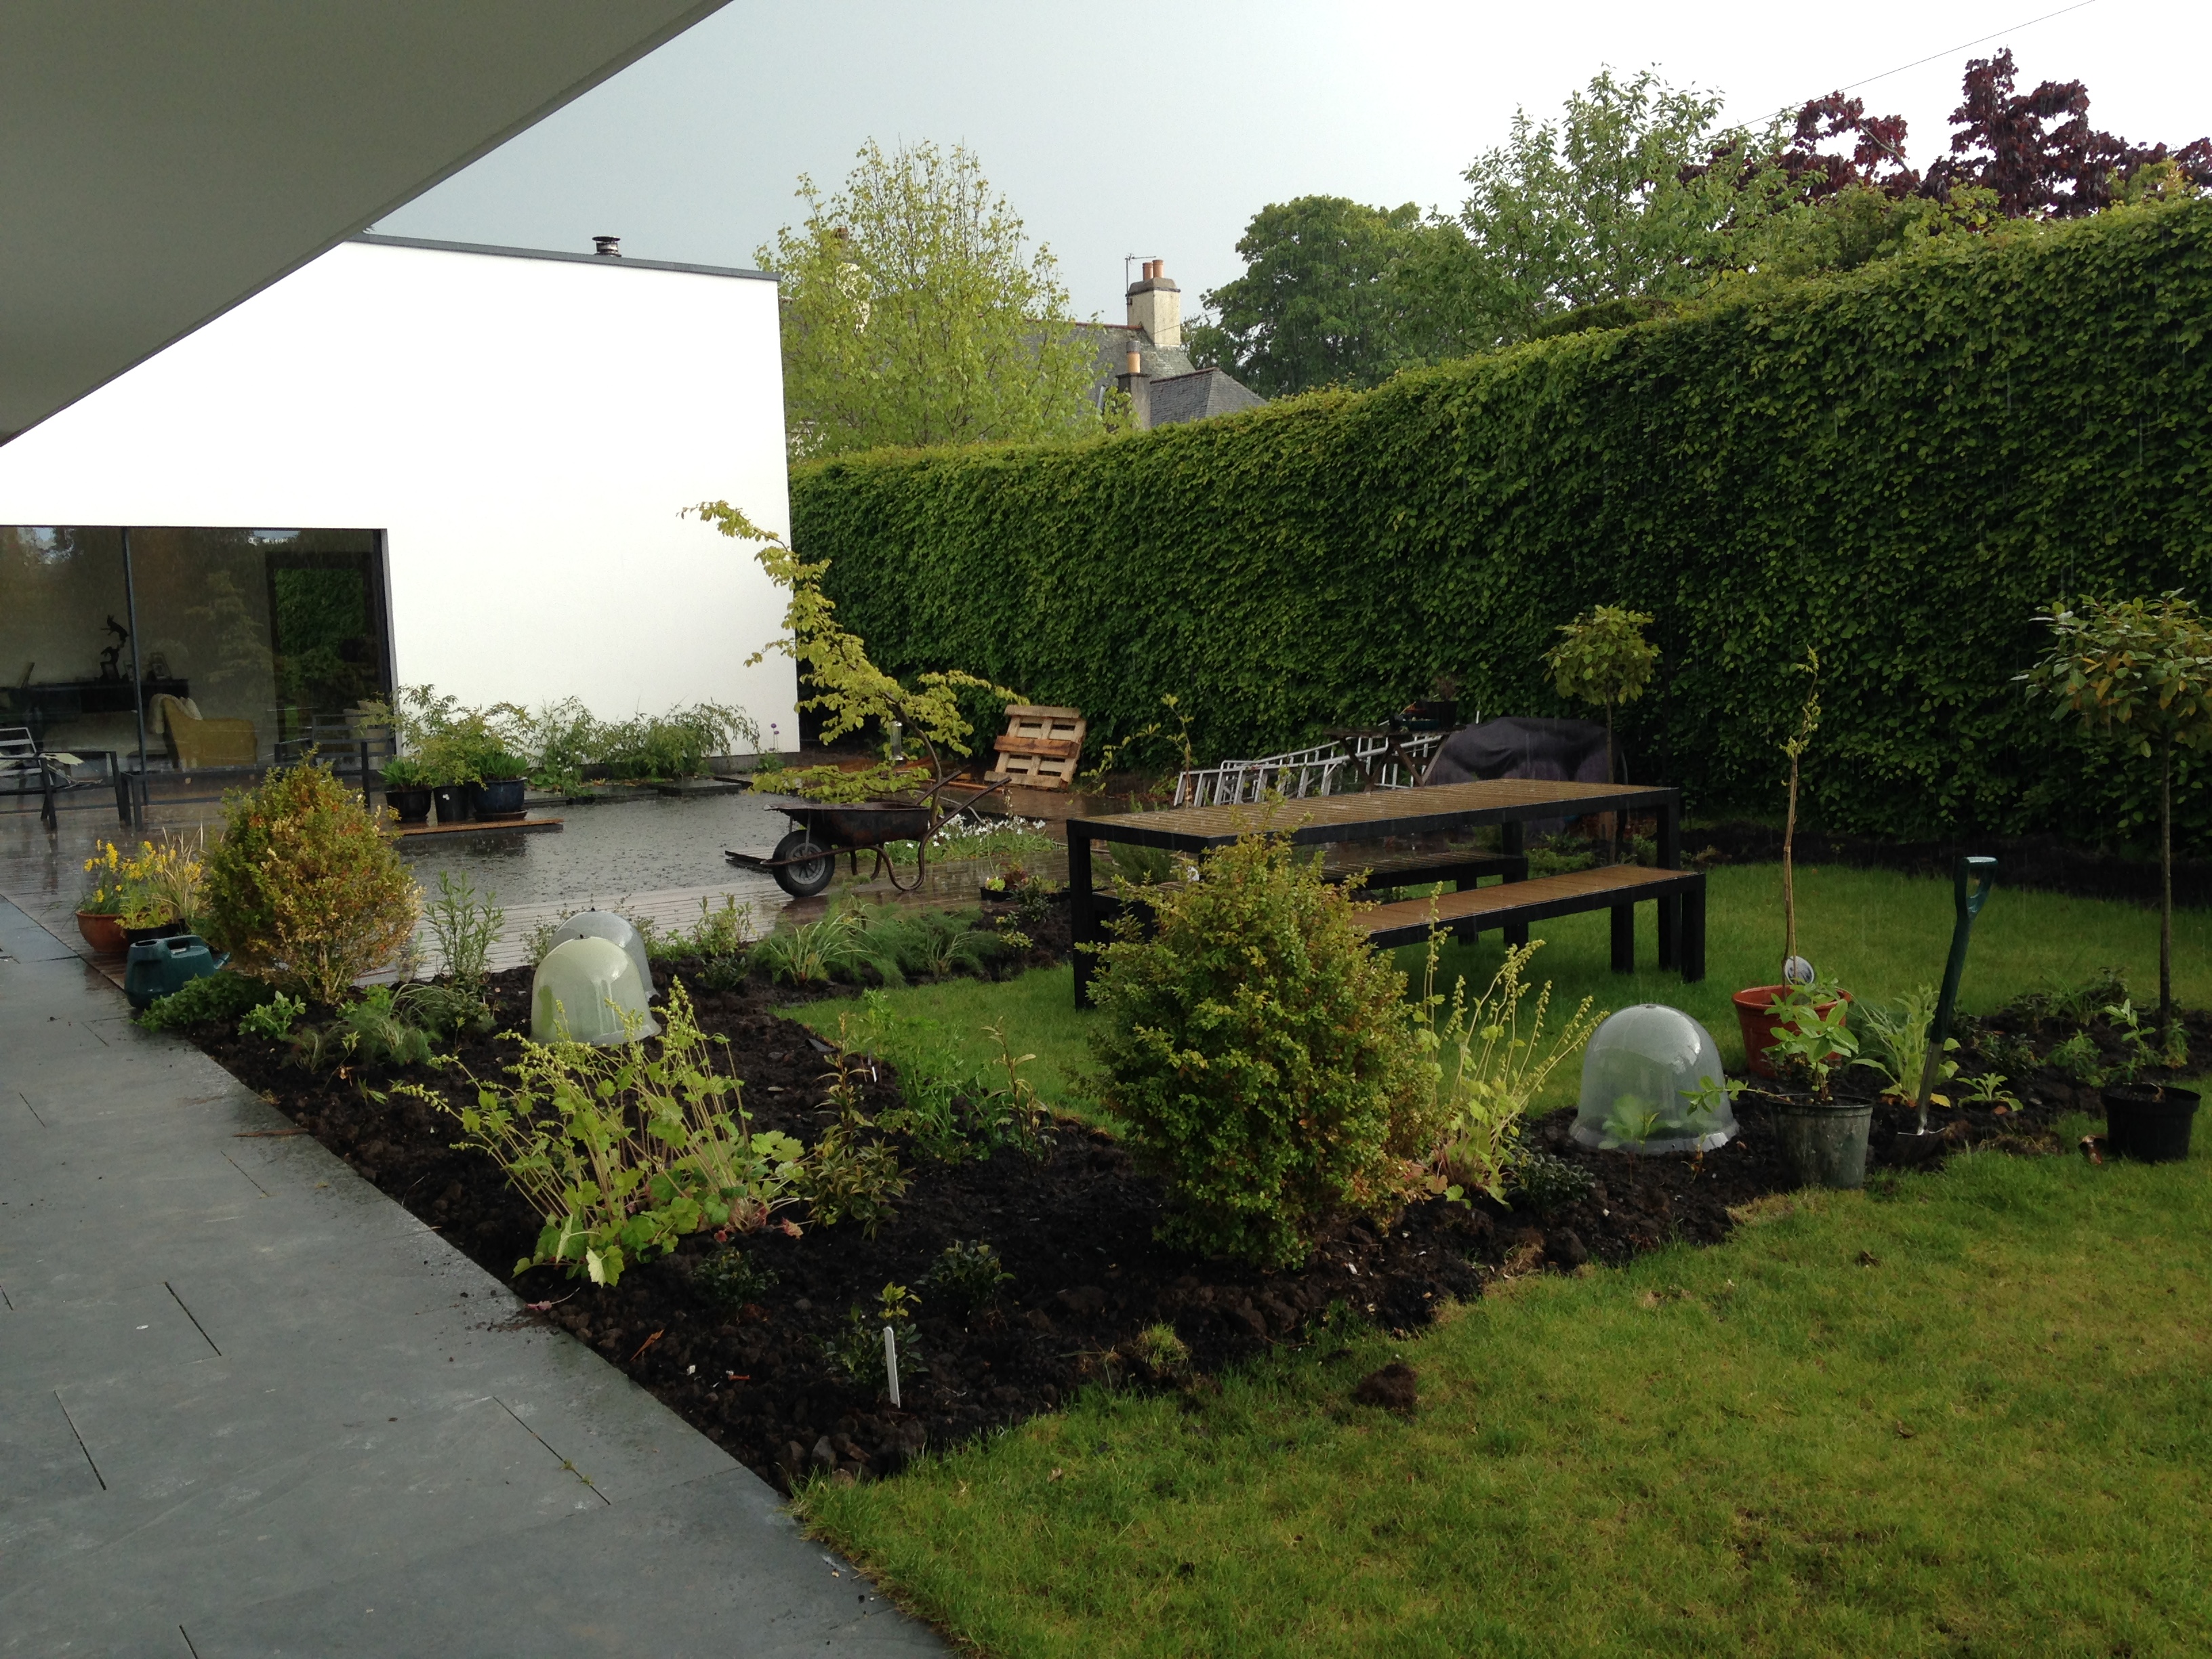
There is no definition between the lawn and the bed
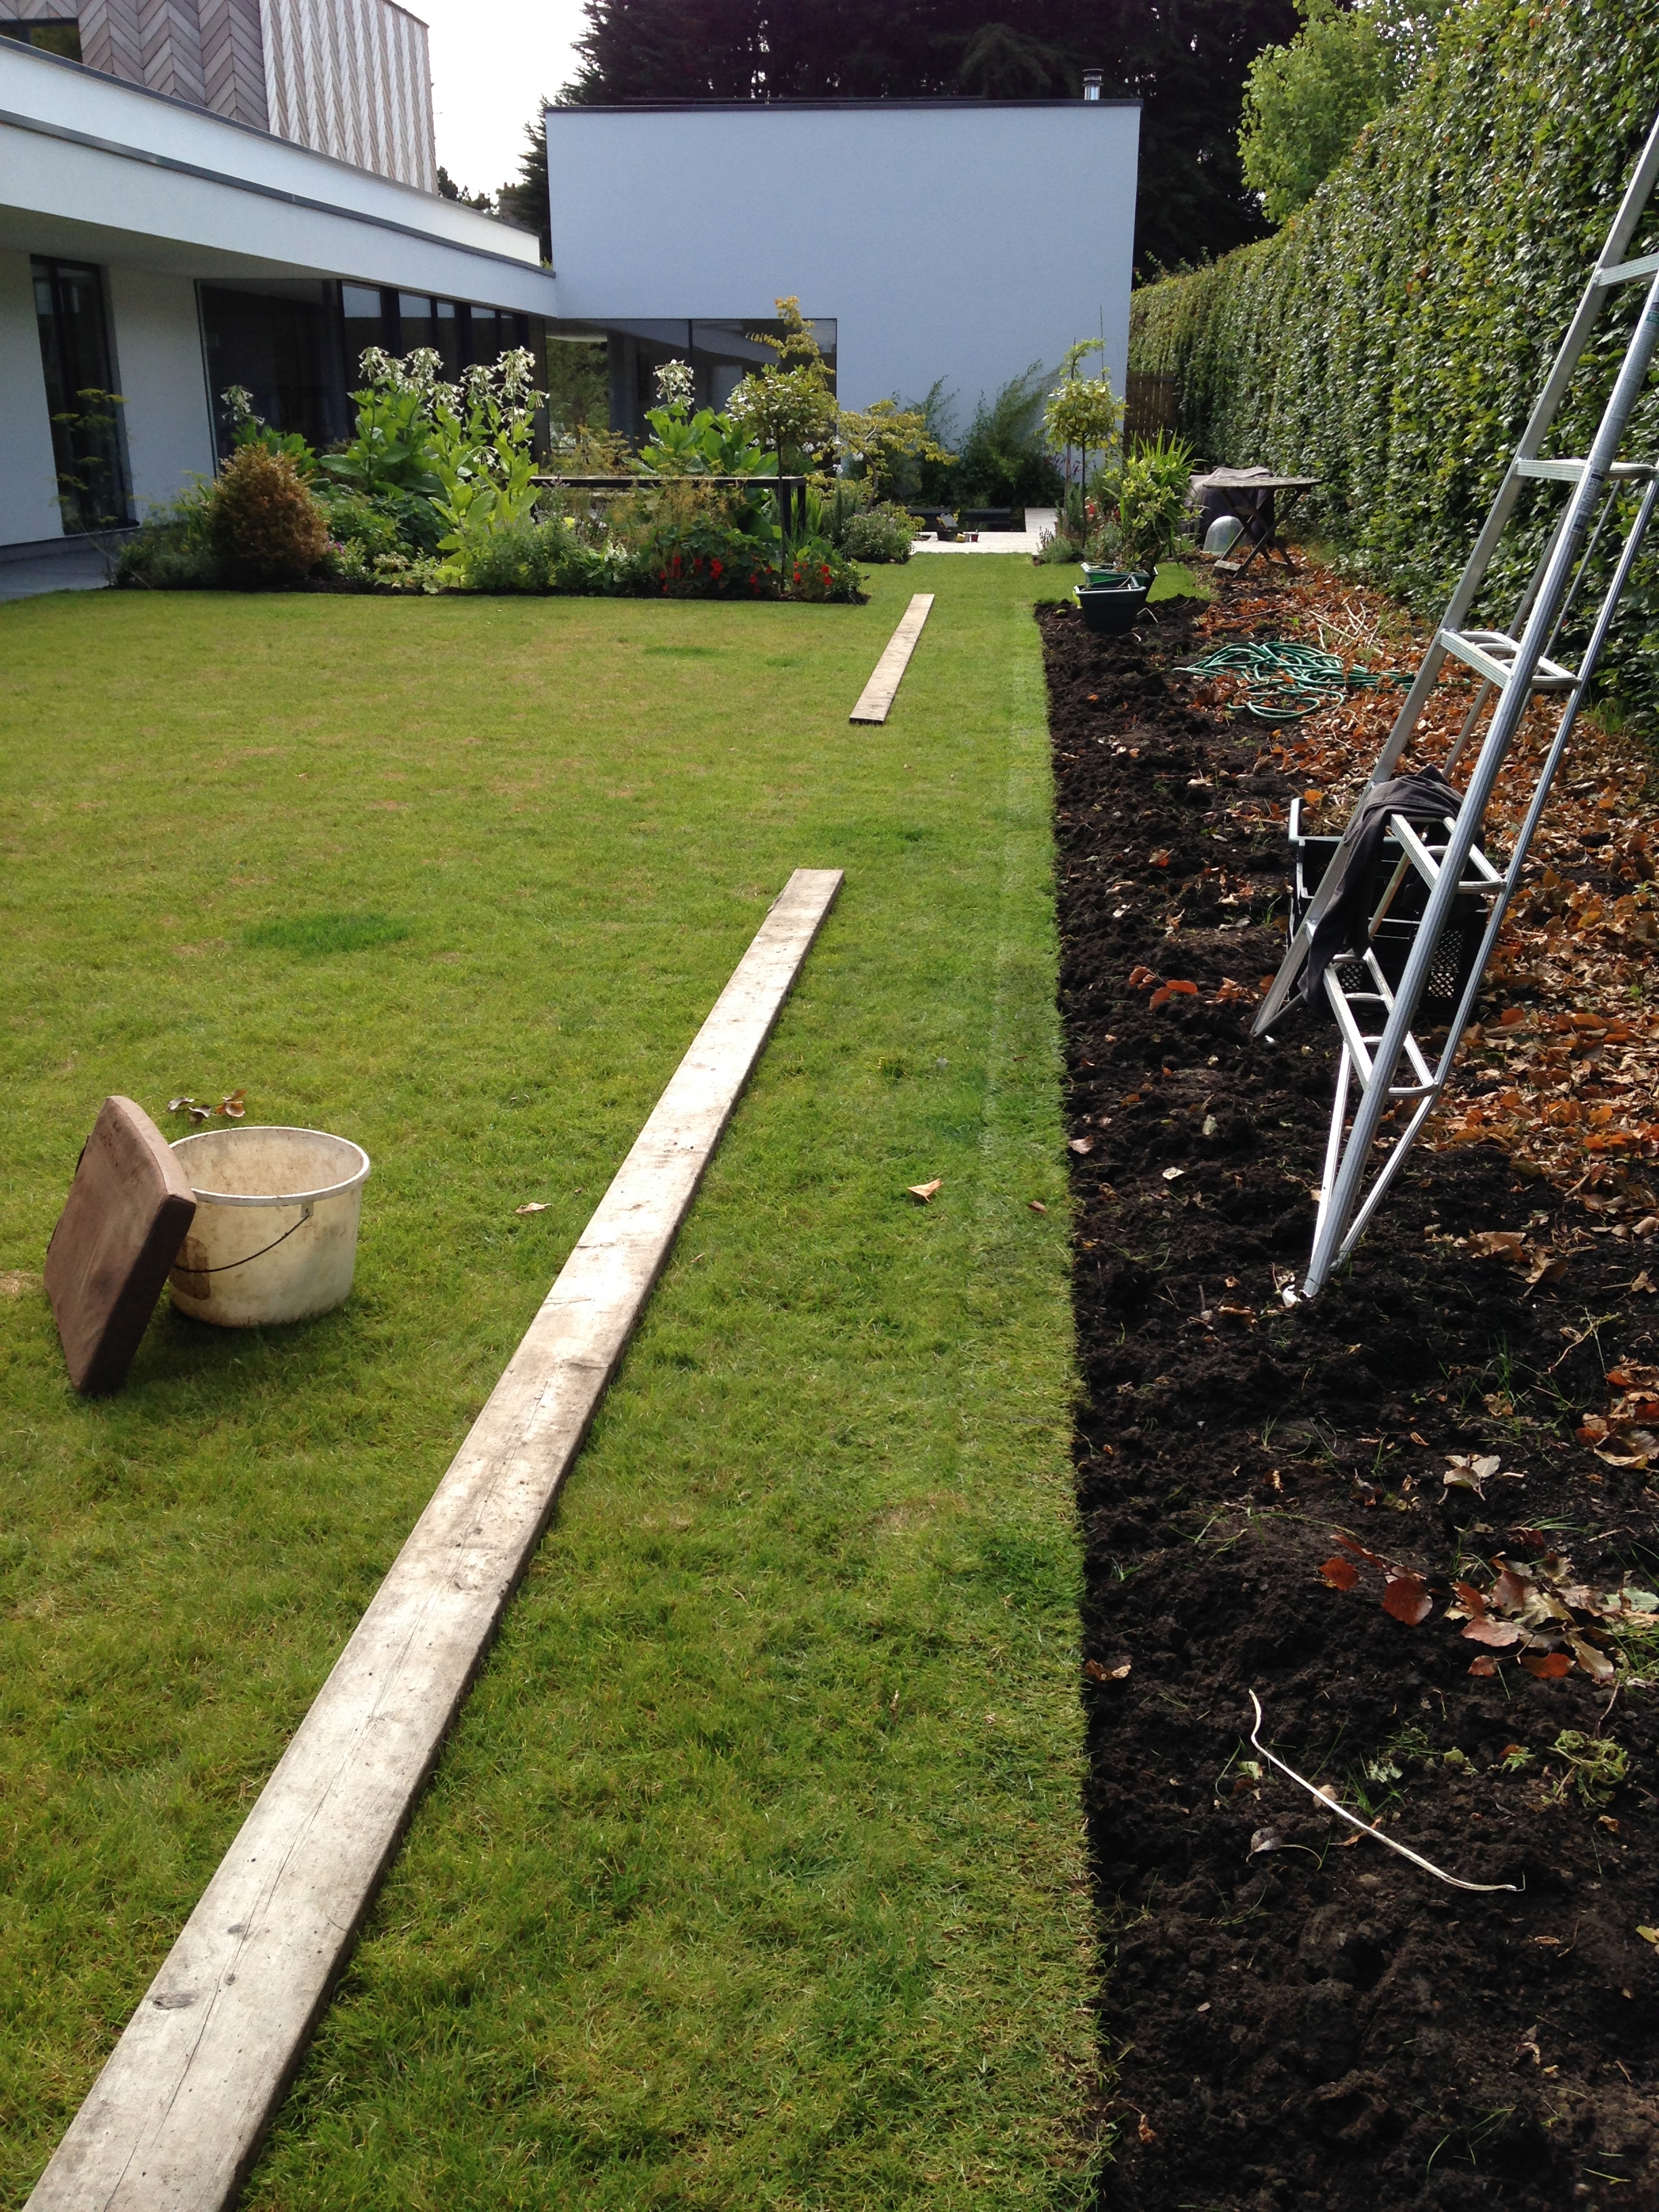
First set your plank roughly where you think you want your edge to be, with the plank sitting on the grass, and the line you want to cut its outer edge.
Mark out the line of the edge with a plank
Now get up and walk to one end of your proposed edge and consider its placement, then the other. Walk around the garden, squinting at the line, from every angle you can. Bash pegs in on the other side of the plank. Walk around some more. Make adjustments to the plank and pegs accordingly, then do the whole walking around squinting at it thing again. Although it seems a faff, this time spent measuring by eye is never wasted. As someone I used to work with taught me: if it looks wrong, it is wrong, even if the measurements on paper – and the ground – are correct.
When you are happy with the line, secure the plank with the pegs, then stand on it and slide the edging tool against the edge of the plank, pushing it down to slice through the turf with the sole of your boot. Position, push down to slice, pull up and shuffle along 15cm or so and repeat. Make sure the pegs aren’t bending and letting the plank pivot.
Once you have got your sliced line, go along it again but this time with a garden fork, standing on the plank again to stop it moving and sliding the backs of the tines right against the plank about 10com into the ground and then gently levering the cut edge loose. Do this along the whole length of the line.
Now get the kneeler out, and your bucket and handfork, and start removing the loosened turf (and probably weeds), shaking off as much soil as possible into the middle of the bed. And that’s it. When you’re done, remove the pegs, the plank, and admire your handiwork.
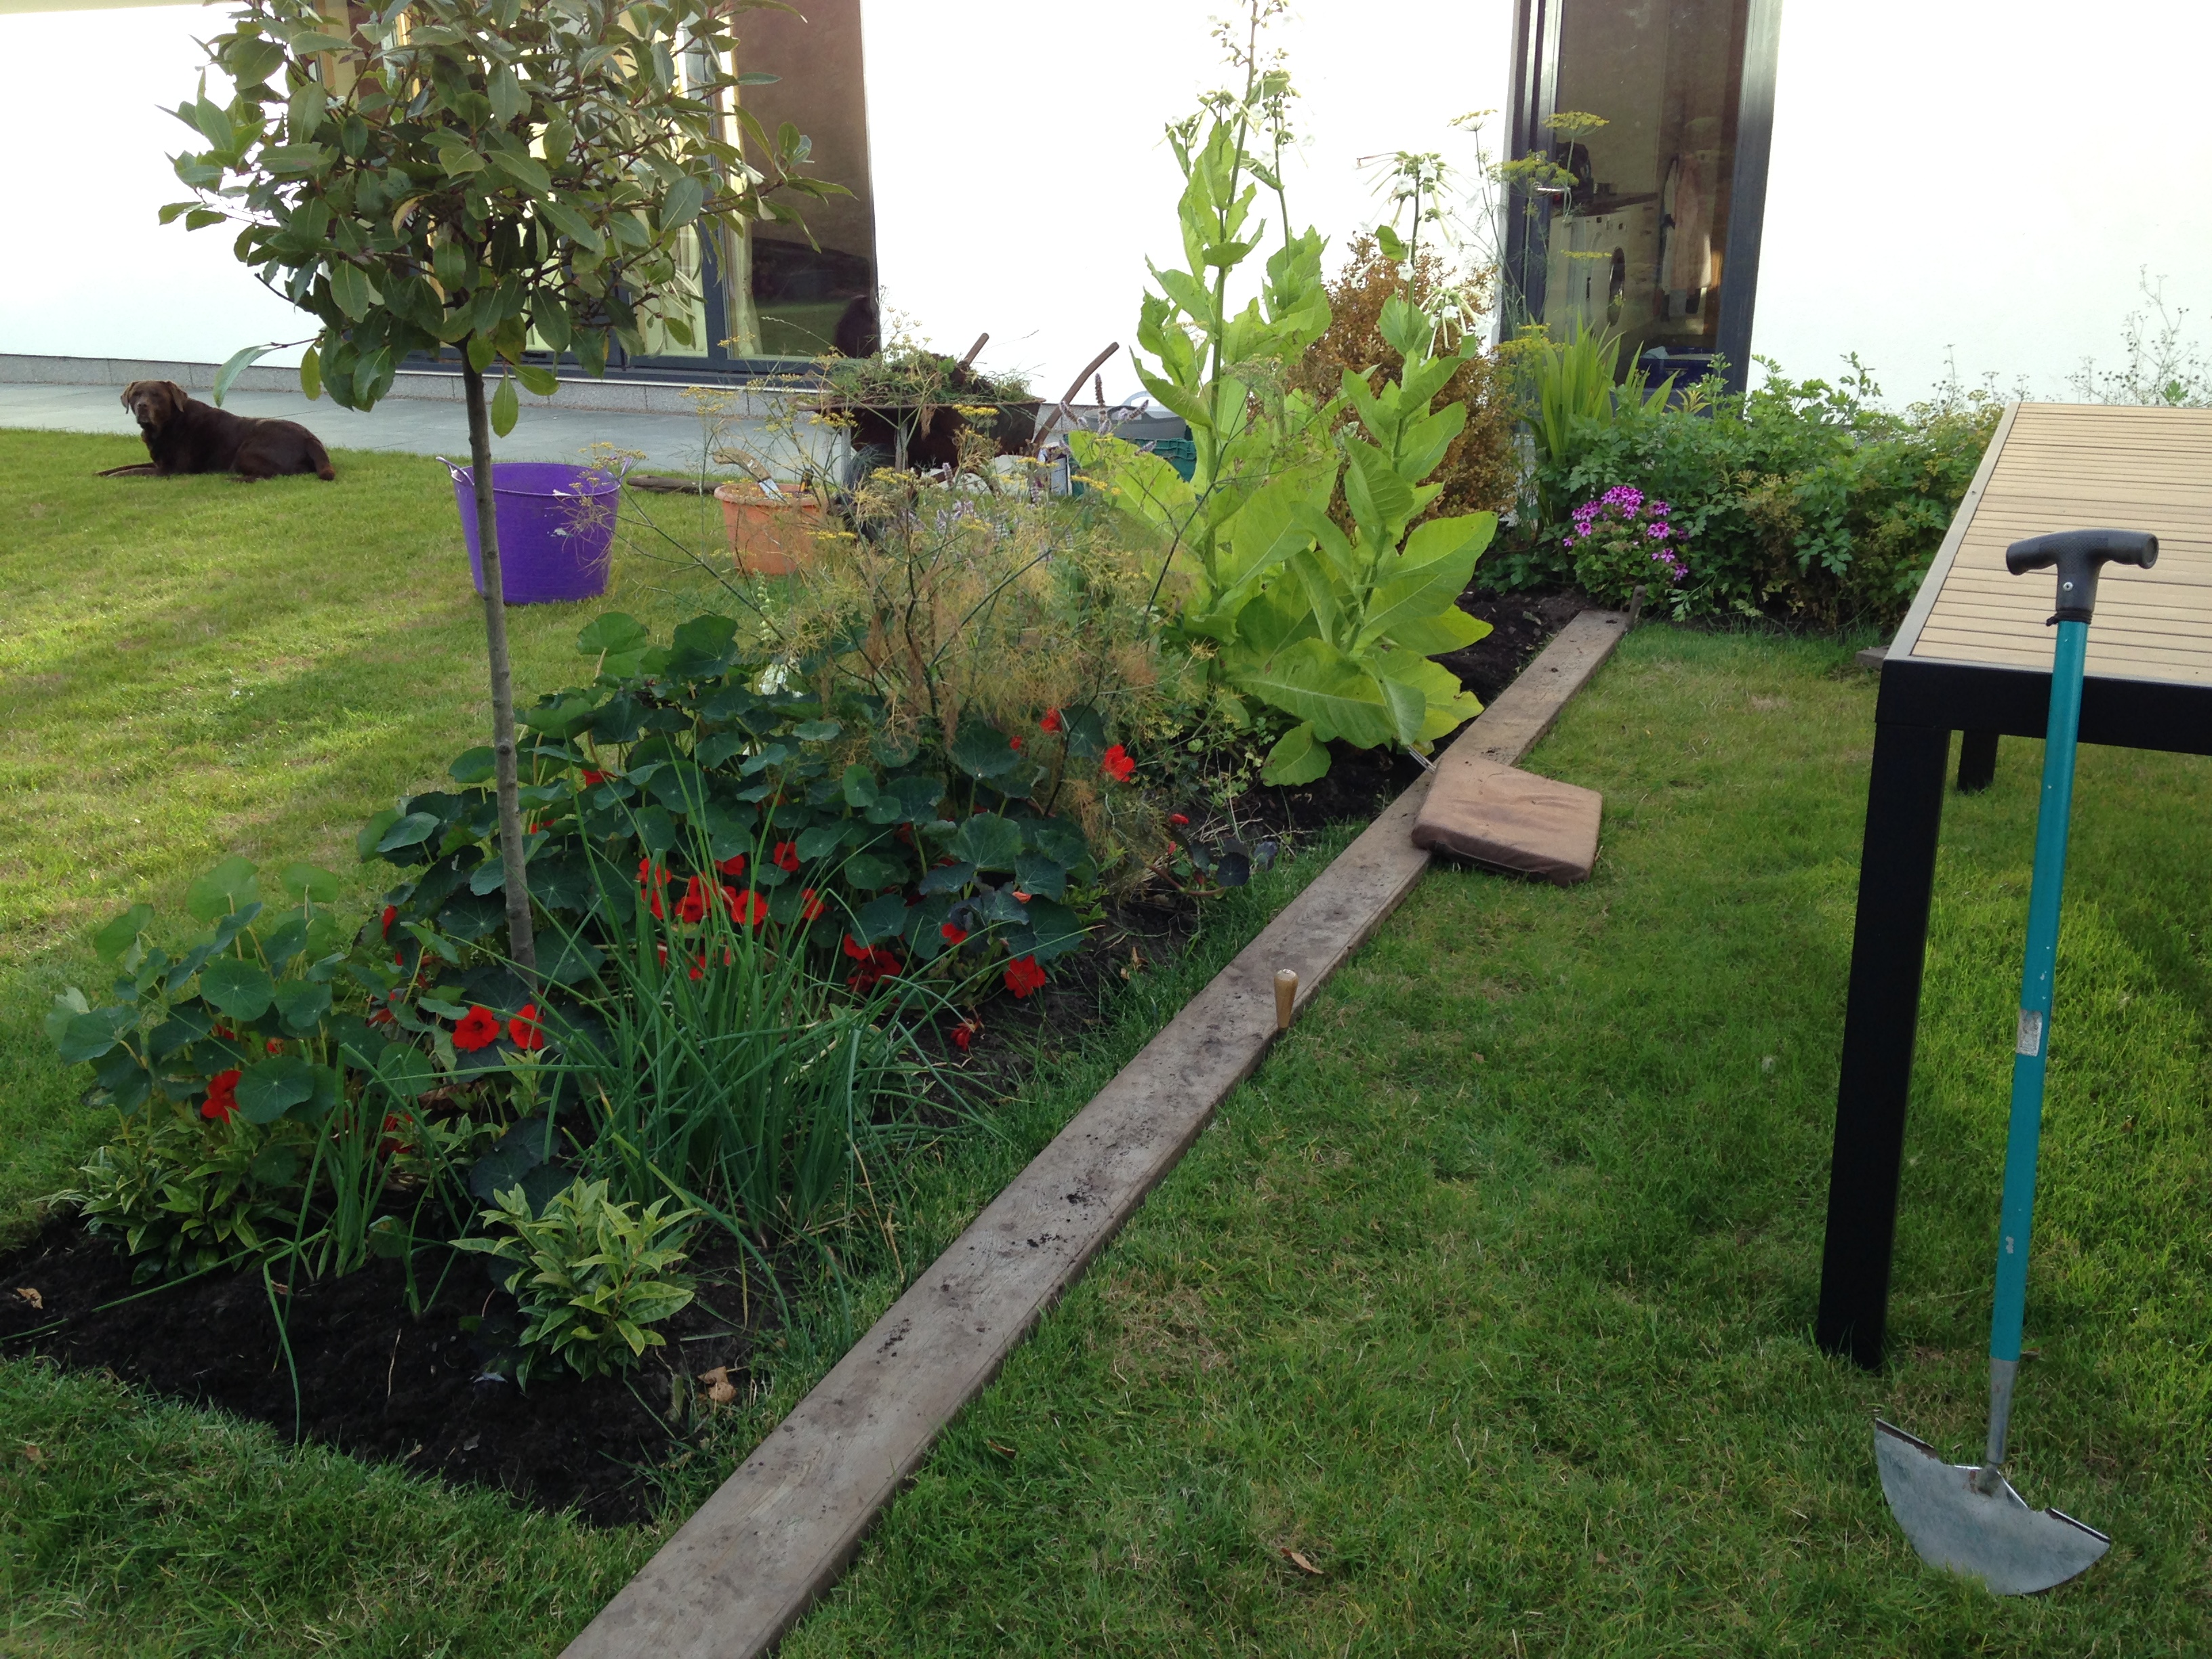
The crisp edges give definition to the spaces on either side of the line
An effect only possible with crisp edges is the impact afforded when plants are allowed to billow or sprawl over the edge. There’s something about a straight line that just begs to be broken.
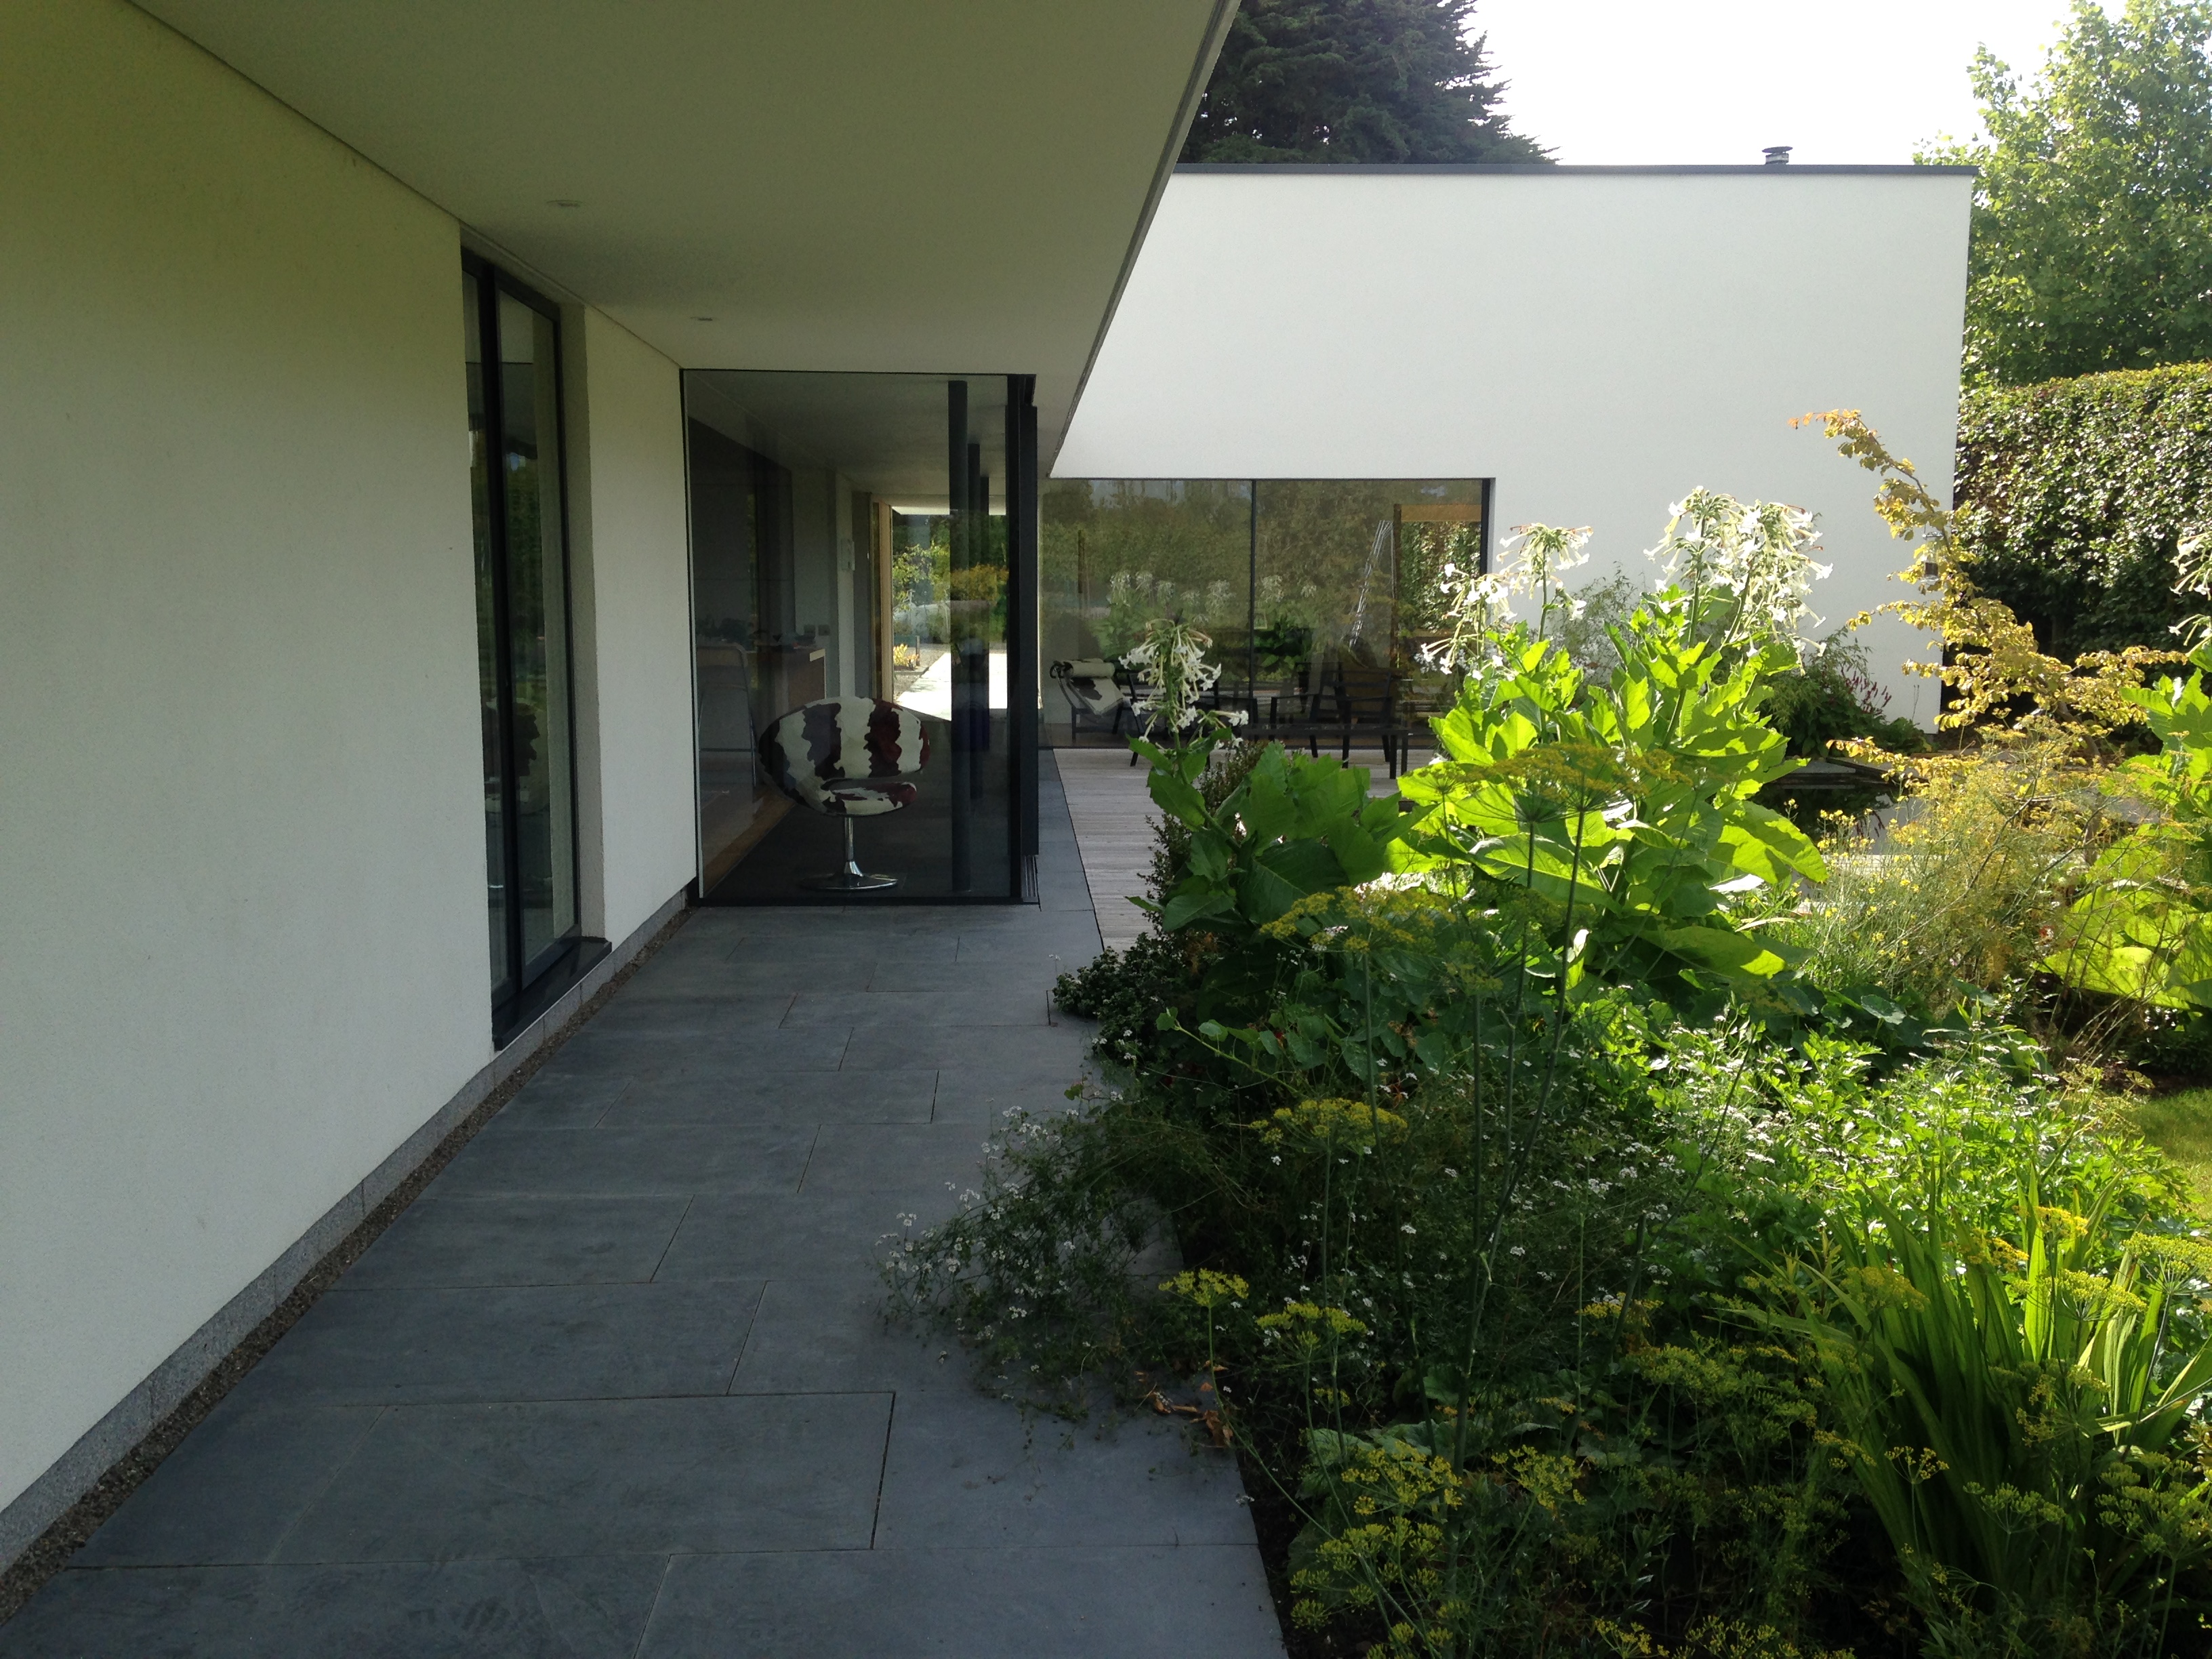
Herbs are allowed to sprawl over the line of the edge
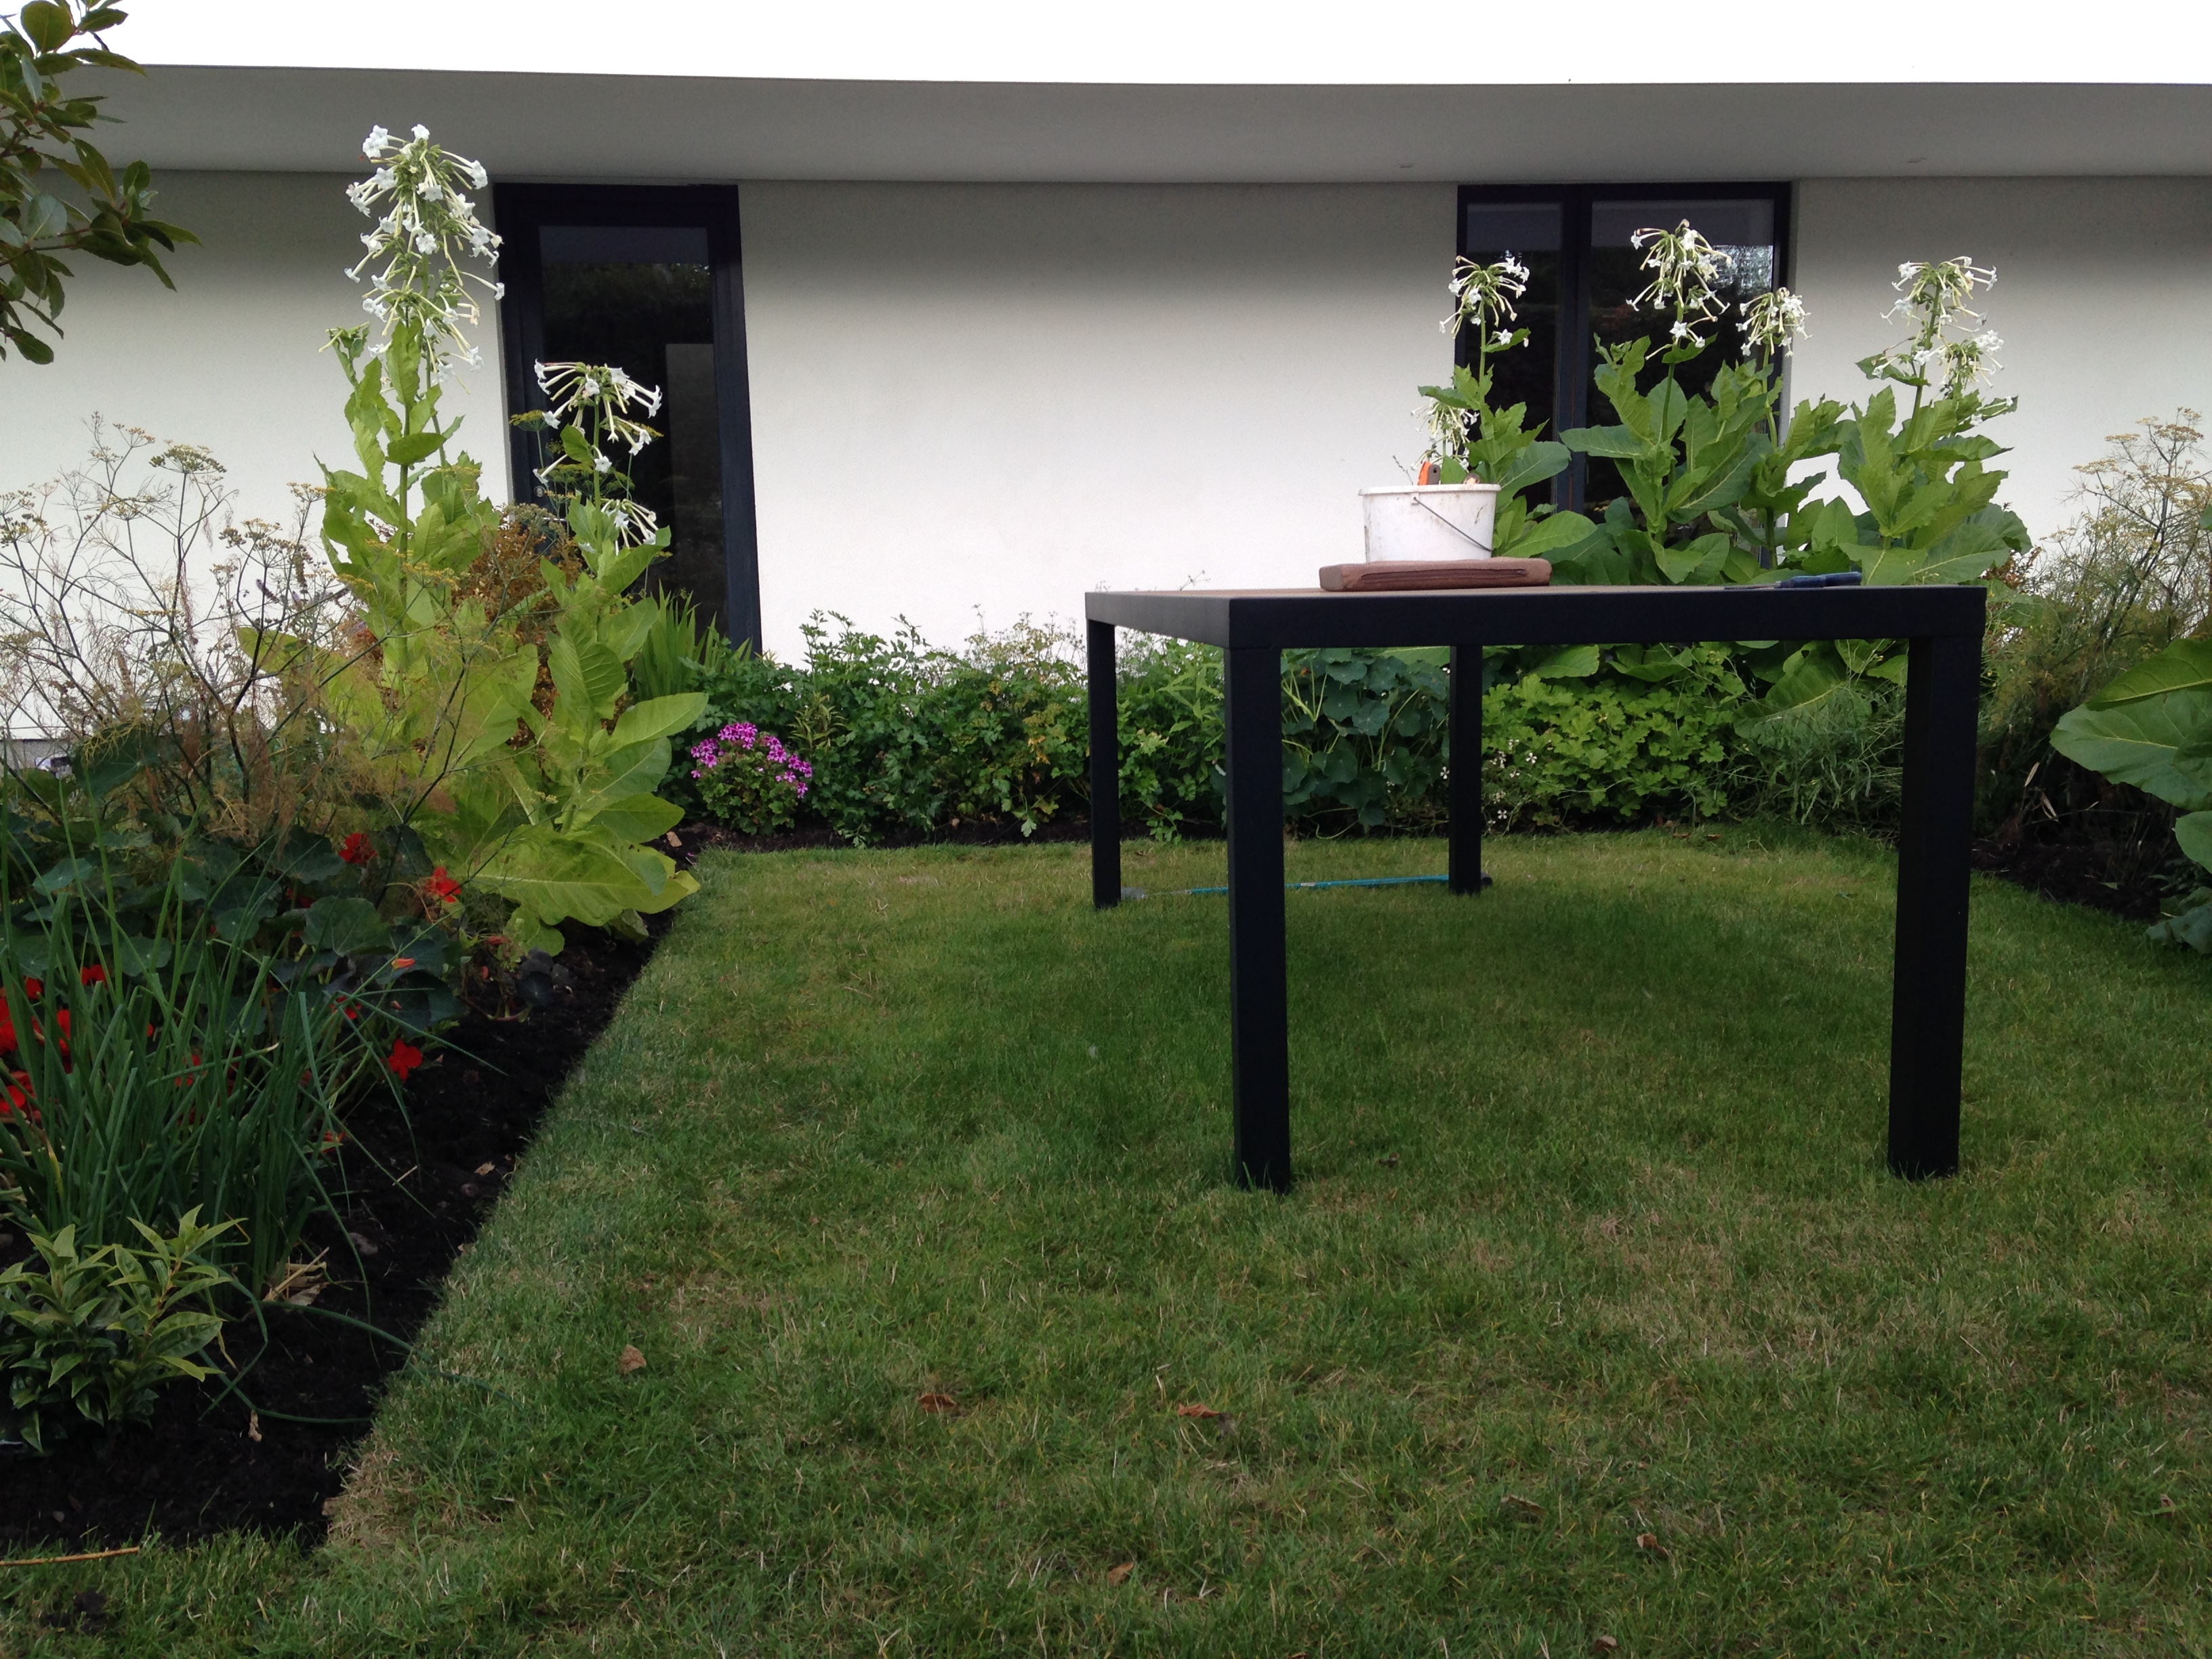
And as an aside, the above is all one season’s growth. The bed was dug and planted in May of this year (below). The cloches are protecting the Nicotiana sylvestris (tobacco plant) got as sturdy pluglets from Sarah Raven, which are the 6′ tall exotic looking plants with white trumpet like flowers in the photo above. Staggering growth in just one season, but although they’re supposed to scent the air on warm summer evenings, I didn’t really notice. Perhaps something to do with the lack of warm summer evenings this year?
The herbs sit in pockets of the Sarcococca matrix
*For this reason I also recommend starting with a bit of the garden close to the house, that you see everyday, and working your way outwards.
**

Long tape measures come in handy for marking out very long straight lines


