And the garden

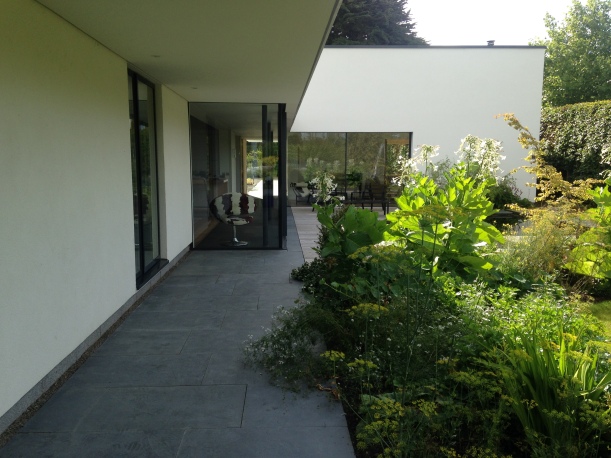
When modern architecture goes outside


3 Comments

Edging: the exception to the rule

When tackling a garden, it is much better to focus your efforts on one small area at a time rather than attempt to start a number of projects simultaneously.  Years ago, my husband (under duress) and I would spend entire weekends flat out doing a bit here, a bit there, only to look up, knackered, on a Sunday evening and not notice any real difference in the garden.  It is important for one’s morale to see results.*

One exception to this rule of targeted effort is that of edges.  Getting your edges right delivers masses of result for relatively little effort, and you can afford to be more profligate in generously distributing your gardening favours around the garden.

There are two schools of thought: those who edge (we are the majority) and those who prefer a more relaxed natural progression from say, path to bed or lawn to border.  Context, style of garden and owner’s temperament all come into this, but it is an Indisputable Truth of Gardening that:

A crisp edge will make everything on either side of it look as if it was intended.


https://i0.wp.com/www.biddenhamgardenersassociation.org.uk/wp-content/uploads/2013/09/P6030070e.jpg

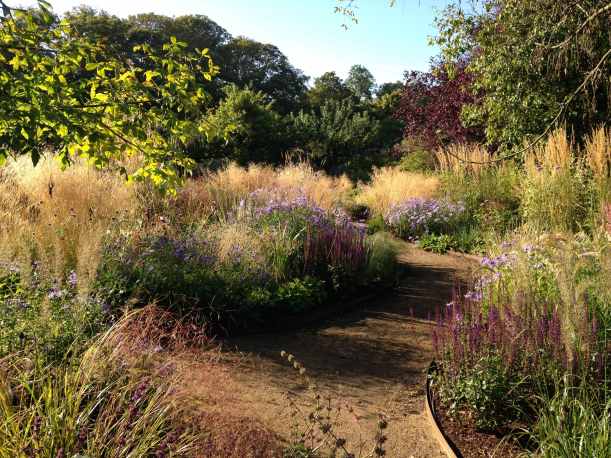
An informal but crisply edged mown path meandering through a meadow. Photo copyright Biddenham Gardeners Association

So, even if the lawn is full of weeds and the border a flopping sprawling disaster where one thug plant has swamped most of the others, a sharp edge to the lawn separating it from the border will cozen the unobservant into thinking that it was meant, that the gardener is still in control.

As detailed in this thoughtful post by Thomas Stone at ThinkingGardens, there are many ways to edge, involving varying effort and expense. After simply mowing an edge into grass (or not bothering at all, I suppose), the ‘cut and weed’ version for simple grass edges that I explain below is the cheapest and easiest to install – and, as Thomas rightly points out, the easiest to move if you decide it’s in the wrong place.  However, the subsequent maintenance is greater than that required for a metal or stone edge.

An edging technique that I covet, but cannot yet afford, is the Corten steel edging that nearby Cambo Gardens use. This only works where you have border on one side and a path that doesn’t need mowing on the other (since you would not be able to mow the 15cm or so closest to the vertical edge, and would have to do it separately, by hand or by strimmer – either way a complete pain).

Corten steel edging

Corten steel edging the beds at Cambo Gardens, Fife

I think there is a place for the more relaxed unedged path or border in the wilder, informal areas of the garden – indeed, a formal edged path would undermine the very wildness.  In the as yet non-existent hidden woodland area at the bottom of my garden I plan to mow a path through the grass where there’s meadow, and simply mulch a path under the trees, like they do at Knoll Gardens.

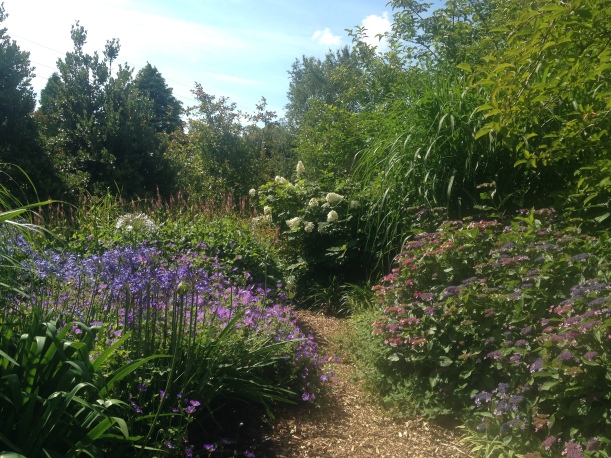
A mulched path with no fixed edge at Knoll Gardens, in Dorset

A mulched path with no fixed edge at Knoll Gardens, in Dorset

But close to the house?  Close to my house, all lines and boxes and angles? Crisp edges all the way, thank you very much.

IMG_8088   IMG_8095

To create your new straight grass edges you will need:

One or more long plank (you can make do with string pulled tight between two bamboo canes but a plank is vastly better).
Four pegs per plank (pegs can be short lengths of sturdy bamboo cane, handtools, etc., anything you have to hand but you will regret using the kitchen scissors. Who, me?)
Very long outside tape measure (optional unless things really have to line up over long distances – I have two 50m ones – surprisingly useful**)
Half-moon edging iron (a spade will not do the job due to its concave-ness)
Garden fork
Bucket
Handfork
Padded kneeler (not vital but you’ll be glad of it)

If you are doing wavy edges, not straight, you can forget about the planks and use a generous length of hosepipe instead.  You’ll still need the pegs, and more of them, so that you can mark out the curves the hosepipe will follow.  And you will also need a can of builder’s marking paint to spray the line – once you’re happy with it – onto the grass to allow you to move the hosepipe to prevent you slicing through it with the edging tool. (What? Move along, nothing to see here.)

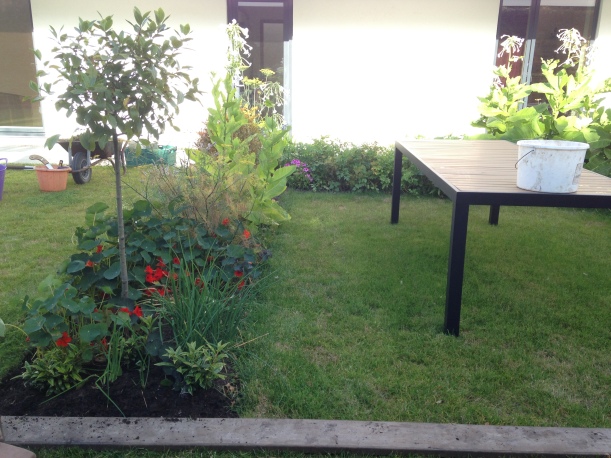
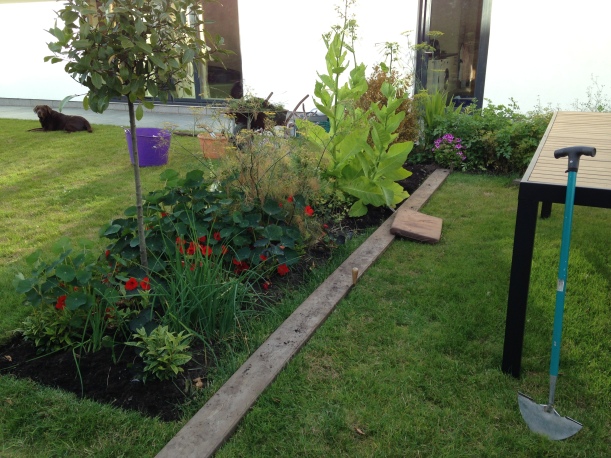
The example that follows is the eating area close to the house surrounded by a horseshoe bed of Sarcococca (Christmas box), herbs and edible flowers. Nasturtium flowers give a lovely peppery kick to a salad, but the lurid colouring of the one below – N. Empress of India – offended me all summer and I eventually hoicked it out way before the frosts were due (I grew a darker one – N. Black Velvet – around the other side that was fine).  You don’t need to tell me: I know it looks garishly vile in my terribly tasteful green and white scheme. Next year I will grow it in the kitchen garden.

IMG_8027

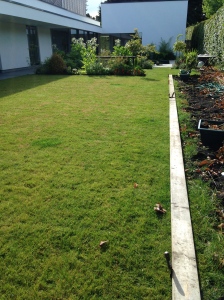
There is no definition between the lawn and the bed

First set your plank roughly where you think you want your edge to be, with the plank sitting on the grass, and the line you want to cut its outer edge.

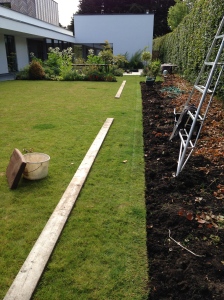
Mark out the line of the edge with a plank

Mark out the line of the edge with a plank

Now get up and walk to one end of your proposed edge and consider its placement, then the other.  Walk around the garden, squinting at the line, from every angle you can.  Bash pegs in on the other side of the plank.  Walk around some more.  Make adjustments to the plank and pegs accordingly, then do the whole walking around squinting at it thing again. Although it seems a faff, this time spent measuring by eye is never wasted.  As someone I used to work with taught me: if it looks wrong, it is wrong, even if the measurements on paper – and the ground – are correct.

When you are happy with the line, secure the plank with the pegs, then stand on it and slide the edging tool against the edge of the plank, pushing it down to slice through the turf with the sole of your boot.  Position, push down to slice, pull up and shuffle along 15cm or so and repeat.  Make sure the pegs aren’t bending and letting the plank pivot.

Once you have got your sliced line, go along it again but this time with a garden fork, standing on the plank again to stop it moving and sliding the backs of the tines right against the plank about 10com into the ground and then gently levering the cut edge loose.  Do this along the whole length of the line.

Now get the kneeler out, and your bucket and handfork, and start removing the loosened turf (and probably weeds), shaking off as much soil as possible into the middle of the bed. And that’s it. When you’re done, remove the pegs, the plank, and admire your handiwork.

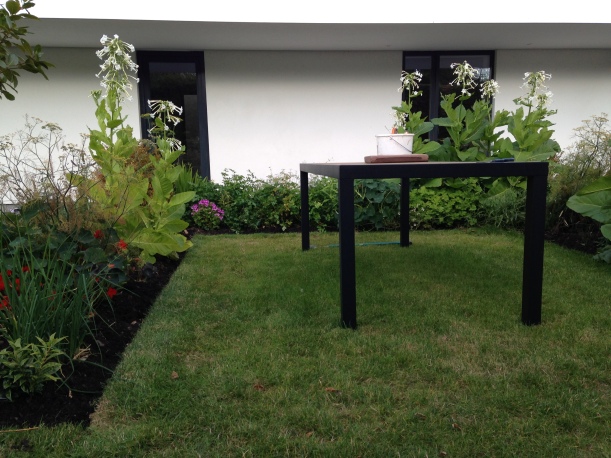
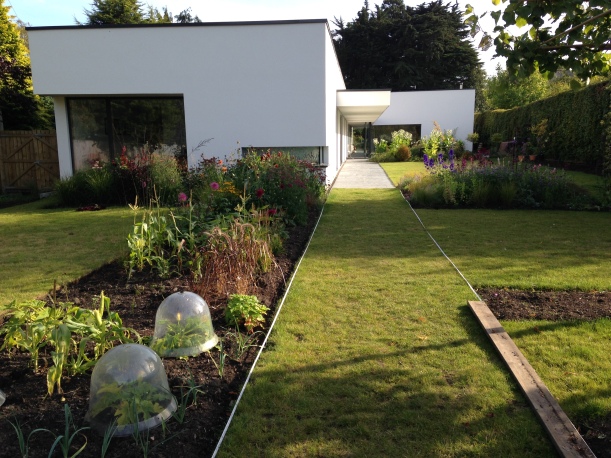
The crisp edges give definition to the spaces on either side of the line

The crisp edges give definition to the spaces on either side of the line

An effect only possible with crisp edges is the impact afforded when plants are allowed to billow or sprawl over the edge.  There’s something about a straight line that just begs to be broken.

Herbs are allowed to sprawl over the line of the edge

Herbs are allowed to sprawl over the line of the edge

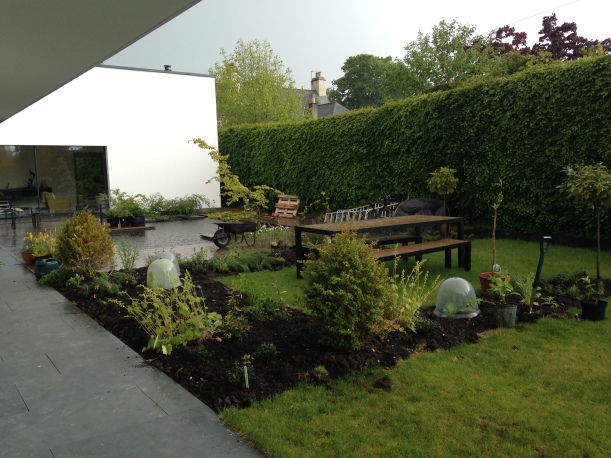
And as an aside, the above is all one season’s growth.  The bed was dug and planted in May of this year (below).  The cloches are protecting the Nicotiana sylvestris (tobacco plant) got as sturdy pluglets from Sarah Raven, which are the 6′ tall exotic looking plants with white trumpet like flowers in the photo above.  Staggering growth in just one season, but although they’re supposed to scent the air on warm summer evenings, I didn’t really notice.  Perhaps something to do with the lack of warm summer evenings this year?

The herbs sit in pockets of the Sarcococca matrix

The herbs sit in pockets of the Sarcococca matrix


*For this reason I also recommend starting with a bit of the garden close to the house, that you see everyday, and working your way outwards.

**

Long tape measures come in handy for marking out very long straight lines

Long tape measures come in handy for marking out very long straight lines


5 Comments

How to Pleach

It seems as though every article I read about pleached trees includes the nugget of information that the word comes from the French word plechier or plessier, meaning to plait or weave.  Gormlessly, I accepted this at face value, despite having grown up in then French-speaking Brussels; despite having spoken French rather well at one point; despite having plaited my hair as a schoolgirl and discussed this – in tedious detail, as one did – in French with my francophone friends; despite my never ever having encountered either variant of the word before.  Someone, somewhere, made this up (or dug it out of an obscure French equivalent of Chaucer), and it has been repeated, unquestioningly, ever since.  The correct term is ‘palissé’ or ‘en espalier’.  So there.*

Whatever size trees you start with, you will first need to make your structure.

If you are starting with young trees that you will train from scratch, you need tall posts set in concrete at regular intervals (5m apart or thereabouts) with tensioned wire making up the horizontal bars between them (four or five bars is usual). Later this year in the courtyard garden I will be doing this too, with seven crab apple ‘Red Sentinel’ that I had to buy young (oh the satisfaction of ordering something on the right rootstock so that its ultimate size will be just right for my purposes).  I have heeled them in beside the garage and will train them myself because I am looking for the lowest bar of the pleached branches to start lower than is usual with nursery supplied trees.  And because it is much much cheaper.  I will teach myself how to do this and post about it in due course.

This post however is about how to treat mature trees which have already been trained individually in the nursery: how to create a structure that links them together; and how to train them to it.

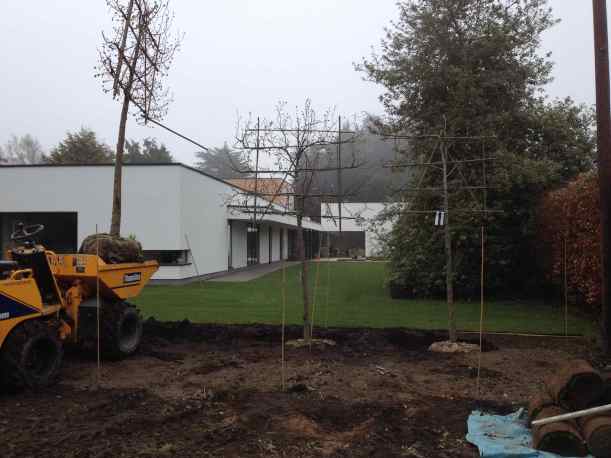
rootballed limes in situ

We planted six small leaved limes (Tilia cordata) in April 2014.  By rights we should have done it a little earlier in the year (the trees were just starting to come into leaf), but although these were field grown trees they were dug up one day and transported to my garden the next, and they were to receive the very best of care, so we risked it.  Their planting holes were large, the backfilled soil mixed with generous amounts of organic matter, and their rootballs sprinkled with liberal quantities of root growth enhancing mycorrhizal fungi (Root Grow, I SWEAR by it).  They were tethered against windrock by an underground guying system (the excellent Arborguy from GreenBlueUrban), which means we didn’t have to have unsightly supporting posts, and each tree had a circle of perforated drainage pipe looped around its rootball with the end sticking up out of the ground, so that I could water them copiously (but only every now and then).

With a lot of hard work, we got them into position. I will not dwell on how unpopular my insistence that the trunks line up with the distant window breaks made me, nor how no one, myself included, made the leap of logic that suggested that a telegraph pole would indeed have an underground cable leading to it, which we promptly dug through.  Once in position, I proceeded to do absolutely nothing to them (except water them and keep them weed free) for the next year.  Mainly because I thought that they needed time to settle in before I started hacking them about, but in part because I didn’t really have a clue what to do next.

limes in leaf year one

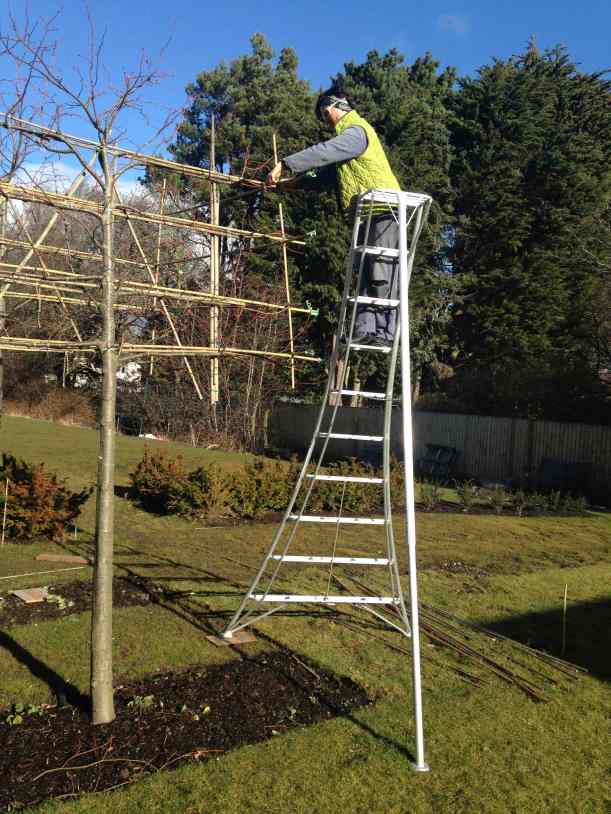
They passed an apparently happy summer (see photo above), coming into leaf and putting on lots of new growth while I bided my time and googled.  Monty Don had what seemed to me to be sound advice, and equipped with my magnificent tripod ladder from Jake Hobson, my trusty Felco secateurs, a ball of twine and more bamboo canes than I imagined possible, I set to work in February 2015 to link these six disparate trees into a coherent whole.

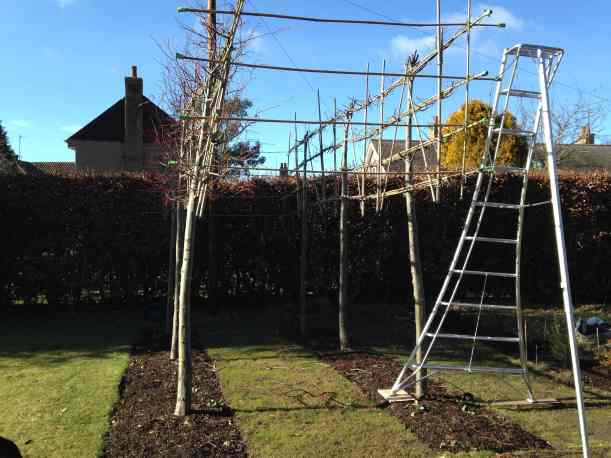
limes - six distinct trees

Tip: wrap up warmly and wear wraparound glasses – being poked in the eye while balancing up a ladder in a howling gale is best avoided.  Also, cut the twine into lengths (short bits of 35cm and longer bits of 80cm) while still in the warmth of the house, and stuff the different lengths into different pockets before you go up the ladder.

limes - building the bamboo structure

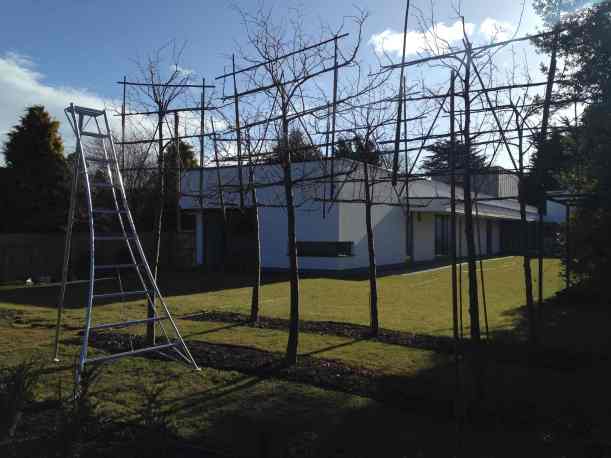
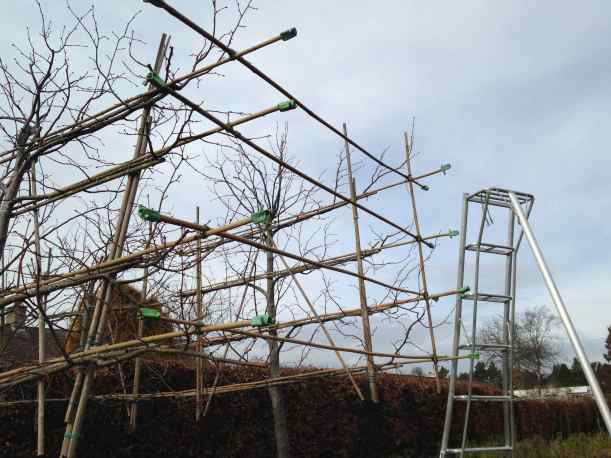
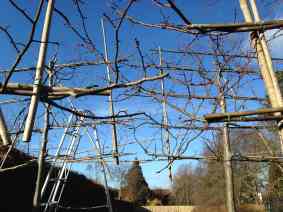
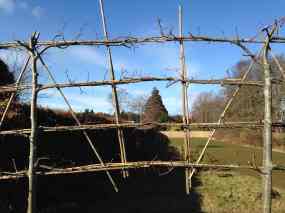
I found it was best to split the job into two parts: creating the new structure first and only once that was complete tying the branches onto the structure. My trees each had four bars of bamboo to which they had already been trained, so the first thing I did was to run new bamboo canes across the gap between the trees, weaving the canes in between the bamboo uprights and the trunks of the trees, and tying them securely into place to the existing bamboo bars with twine in at least four points along their length.

Once I had a solid – if slightly wavy – line of canes along each of the four bars, I then extended the structure out at either end with more canes, one end tied into the bamboo structure, the other reaching out to the point I wished to grow the foliage (above but abutting the datum).

limes - lining up edge with datum

Because the shape I am going for is a sort of shoebox on stilts, I want to train the branches of the two end trees to form right angles and meet in the middle.  I therefore connected the two rows of trees with four horizontal canes (which I also braced with verticals in the corners for strength).  By now the trees had more bamboo in them than they did tree (and over a week had passed), but I could finally start tying the branches to my bamboo structure.

limes - lining up the end structure

Although the trees were quite twiggy and it had been fiddly to get the bamboo canes in place, until this point I had restricted myself to only pruning out the deadwood.  One never knows when a branch will come in handy, and I learned that small leaved lime is amazingly bendy, which, it dawned on me, explains its popularity for this purpose.  (I will have to be a lot more gentle with the more brittle crab apples when I come to train them.)

limes - back row pruned front row unpruned

I tied in whatever I could to the horizontal bars, and then marshaled my quailing resolve and pruned out everything that was not in the right place for the shape I wanted, some branches back to 4-6″ or so, some right back to the branch bark collar with the trunk or main stems.  I removed most of the new growth, as illustrated in the above photo showing the pruned back row and the unpruned front row (I started with the least visible bit until I got my courage up).  The photo above also shows how we really should have thought at the outset about placing the six trees according to their straightness of stem, and hidden the one at the front on the left which has a backwards lean to it in a far less prominent position.  I have built the structure to compensate, but I will have quite a job to train the bushy new growth out so that the vertical face of the ‘green box’ appears straight.

lime branches before being tied into line   lime branches tied into line

The two photographs above are before and after.  And although I suspect that I might not have been ruthless enough, I will be very relieved come Spring to see them come into leaf.

limes with weights

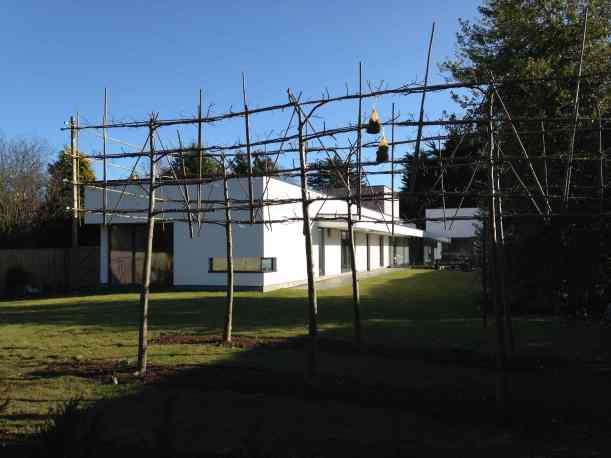
The above photograph shows the end result. I am very pleased with it, but looking at it now I think I will have to get back up my ladder and lop the tops of the vertical bamboo canes that break the lovely horizontal lines.  The two orange bags hanging from the branches are mesh bags that some of my Peter Nyssen bulbs arrived in (see?  I knew they would come in useful), weighted with rocks and tied to joins that had an upwards arc to them, to try to bring them slowly into line with the horizontal.  My husband finds them vaguely unsettling, reminiscent of a medieval display of the heads (or worse) of one’s enemies on spikes .  I can’t see it myself, but there’s a novel idea for a show garden at Chelsea if ever I heard one.

* I blame Anne Wareham for my pugnacious tone.  I have just finished reading ‘The Bad Tempered Gardener‘ and I am feeling inspired.


Leave a comment

The Tale of the Bathroom Window

Listed on our very first brief, when the design of the house was still just a twinkle in the architect’s eye (and, crucially, before we had settled on a predominantly single storey design) was the item ‘bath window at eye-level’.  Building one’s own house gives one the opportunity to incorporate quirky and bespoke elements, and these rarely fail to deliver lasting delight.  Remind me to tell you about our storm door one of these days, and how our cold larder off the back kitchen is actually outside the envelope of house insulation.  I digress.

I must have been inspired by something like this (Karen Cilento’s photo of Paul Raff Studio’s Cascade House in Toronto as featured in Arch Daily:

Cascade House / Paul Raff Studio

I imagined soaking in the bath after a long and productive day spent working in the garden, letting my gaze roam out over the swaying grasses and structural planting, and yes, maybe even sipping a glass of something chilled while I basked.  How indulgent, how civilized to be able to enjoy the fruits of my labour from my bath.  And so it came to be.

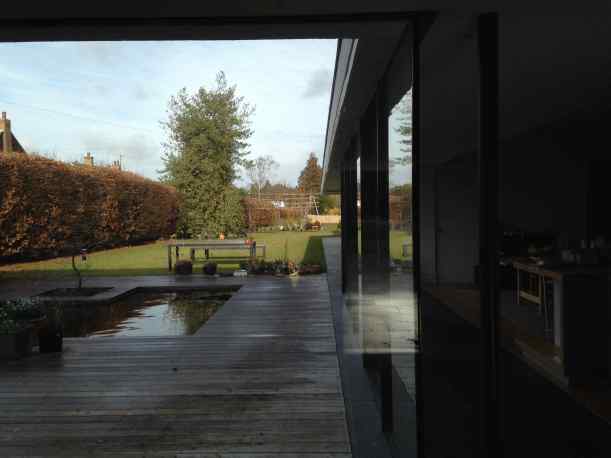
The horizontal bath window can be seen at the far left of the drawing in the blog banner, above, and, in the photo below, seen from the back garden (the large glass window & door to the left of it is the bedroom).

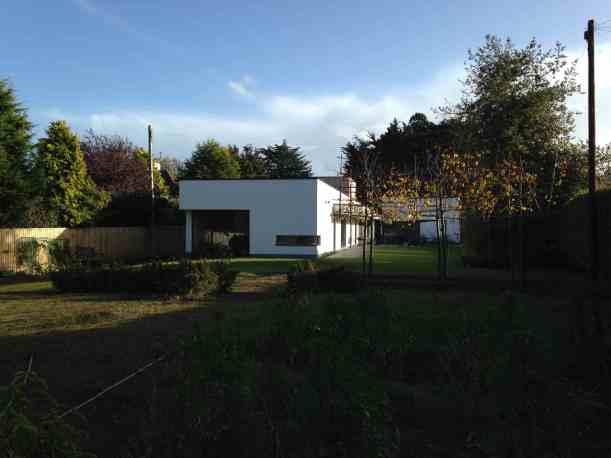
House seen from back garden

All through the build I cherished the thought of this little idiosyncrasy, not pausing to identify that a key feature of the bathrooms of my inspiration was that they were not on the ground floor.  I remained blithely unconscious of the implications of this fact and then one happy day we moved in.

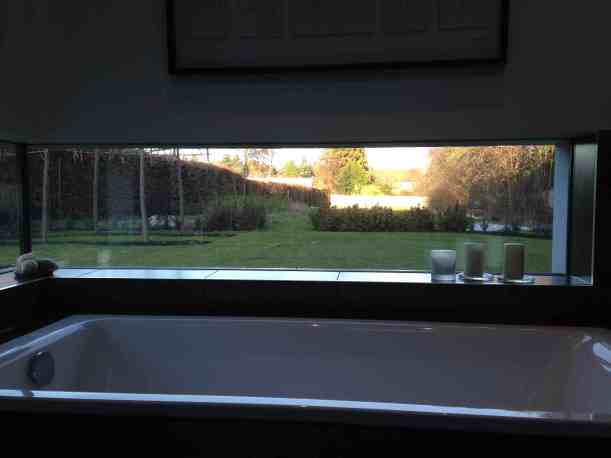
View from bath - day

And it was great.  During the day, that is.  And also providing no one was outside in the garden while I was in the bathroom.  At night, as I daresay even the meanest intelligence will have by now deduced, it was a different story.

View from bath - night

Now I don’t care how sensible or how rational you are, how little you are troubled by silly thoughts: I defy you or anyone else not to lower themselves naked into a bath in these circumstances without wondering whether there is a prowler somewhere in the garden, getting an eyeful. Frankly, it cast a bit of a pall over the whole bath-time ritual, and I only really relaxed once the glass had steamed up.  A frosted film applied to the glass was clearly the answer, but that would then defeat the purpose of me being able to look out at the garden, and we might as well have done without the blasted window (and the extra cost of the wretched thing) in the first place.

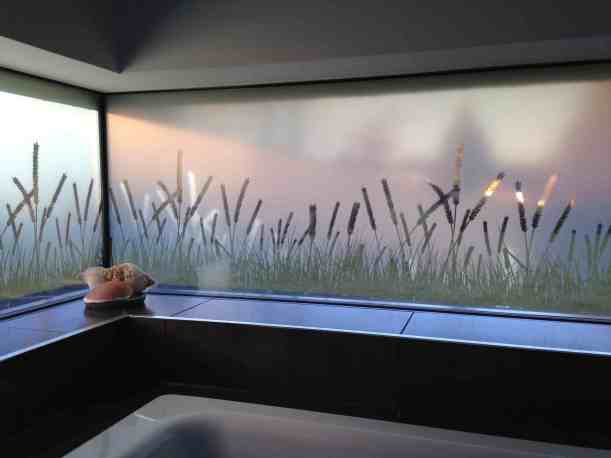
So I mulled things over (uneasily, from the bath, firmly telling myself to buck up and that it was highly unlikely for there to be a Susannah and the Elders situation occurring, but…), and then last week I stumbled across a firm that supplies frosted glass film with a transparent pattern on it.  And not just any old pattern, but a transparent pattern of plants.  There was even a choice of designs.  And while the purist in me was rather holding out for Pennisetum or Briza seed heads, I settled happily for wheat.

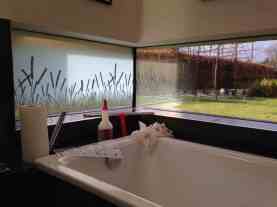
Applying frosted film to bath window  Frosted film seen from exterior

It was straightforward to apply, looks great from the outside, and because my head is level with the base of the window I can see through the transparent ‘blades of grass’ bit of the pattern, right out into the garden.  When the low winter sunlight streams through the window, it casts delightful clear shadows.

Frosted film - application complete

Thwarted, the prowlers will have to move on to pastures new, and I can enter the bathroom while my son is playing football outside with his friends without worrying that I might inadvertently scar them for life.

I am thoroughly pleased with myself and have hardly left the bath since.


Leave a comment

Choosing a Tree, part One

There are two main types of plant-buying gardener: those who buy what is in front of them (often in flower) and then plan where to put it; and those who first plan what they want and then source it.  No gardener ever entirely overcomes the first behaviour, it’s just that the impulses tend to be for more unusual plants in special nurseries – or late night online temptation.

The available garden space that most people have does tend to limit impulse buying to shrubs and herbaceous plants – it is a foolish gardener, or one with a very large garden, who buys a Wellingtonia, Sequoiadendron giganteum, on a whim.  I am that gardener.  I then compounded the error by dithering over where exactly in our 10 acres to put it and temporarily heeled it in quite close to the drive.  When we sold the house ten years later, it was still in its temporary position, only it had grown considerably.  I am struggling to phrase how relieved I felt that the wretched thing was now someone else’s problem without appearing utterly craven, and failing.


Sequoiadendron giganteum; Liquidambar styraciflua ‘Worplesdon’

I do learn from my mistakes and have not repeated that one, unless you count the Liquidambar styraciflua ‘Worplesdon’ bought as soon as I clapped eyes on it in the excellent Kirkdale nursery in Aberdeenshire, but I placed it successfully, so I don’t.  And an unnamed, as yet unidentified tree found (slightly root-bound) in a corner of the Dundee Botanic Garden plant shop that had such blazing pink and magenta autumn colour that I had to have it, no matter that none of the available gardeners (or for that matter, visiting gardening friends) knew what it was.  It will probably turn out to be something ploddingly ordinary that is usually a shrub but that has been trained as a standard, and this denouement will almost certainly take place during a visit from gardeners I had been hoping to impress.

In his thoughtful and inspiring account of planting his former London garden, ‘Home Ground: a sanctuary in the city‘ (I urge anyone planning a garden to read this exquisitely written and photographed book), Dan Pearson describes his deliberations in choosing a tree for a prominent place.  I particularly appreciated following his thought process as he debated the merits of first one species then another:  even more so, his sharing of the fact that the first two he planted were not quite right and were subsequently moved.  Too often, gardening authors only divulge the end result, which makes them appear very knowledgeable and decisive, but which can make the novice despair of ever commanding such a unerring grasp of plant possibilities.

Because they take a while to reach a good size, and you will be looking at it for many many years, if you are going to plant a tree both you and it deserve your spending a bit of time choosing what sort.  Why plant any old thing when you could plant something that will enchant you year after year, whose seasons you can anticipate with delight, and which by observing it through the cycles of the years will enrich your life?

If you don’t know where to start, have a think about what pleases you in a tree – be inspired by childhood memories, great holidays, gardens visited, neighbourhood trees that you always notice, paintings and photographs.  (Here is where I admit to Google Image searches, and an unhealthy Pinterest addiction.).  Go and visit some local gardens, take your phone and photograph the trees you like best.  Make a note of what you don’t like, too, as it is very useful in narrowing down the endless choices.  Many books have been written on the subject (and please do add your suggestions – about books or trees – to the comments section, it would be lovely to hear from you.)

While we are discussing tree choices I feel I must take a swipe at the many excellent conservation organisations who routinely distribute free native tree saplings.  While a spreading oak in the right setting feeds both wildlife and the soul, most of us simply do not have large enough gardens.  This applies to most of the other native species too, and smaller native trees such as Sorbus, the rowans, are rarely as colourful as their ornamental cousins.  I would make (and have in my garden made) an exception for both silver and downy birch, Betula pendula and B. pubescens:  although the bark of the natives is not as striking as many exotic species or cultivars, the delicacy of the leaf in movement is unparalleled.   And they cast little shade so you can grow lots of things underneath them.  And…  excuses, excuses.

birch shadow small

Shadows of Betula pendula on the white rendered wall of the house

The important thing is to justify your choice of tree because you love one or more of its characteristics.  Remember: at this stage you are merely gathering information and inspiration, not worrying overmuch about practicalities.  The more trees on your list, the better.  As you get your eye in, you will find you start to recognise certain trees, and with this comes a great satisfaction.  The next stage is to look at your site with a gimlet eye to whittle down the list, and we’ll do that in the next post.